

This tutorial was written by Monti on November 6th 2006. It's concept is copyrighted to Monti. Any creation you make from my ideas are yours. You may print out this tutorial for your own personal use, but please do not copy it in any way to put online, pass out or rewrite without my permission or worse yet attempt to claim as your own.
This was written for PSP 9 but will work in other versions.
For this tutorial you will need:
Paint Shop Pro
Animation Shop
Xero Porcelain
It can be downloaded from www.xero-graphics.co.uk/freeware.html
A Texture of your choice
Brushes of your choice
My Supplies
Download Here
This includes my Heart Hanger and the Template
Template was made from a frame by MzKels.
A Bow of your choice
A Font of your Choice
I am using Starstruck font.
4 Tubes of your choice
The images used in this tutorial are ©Olivia used with a license from CILM.
Please only use an artist you have permission for.
Ok we are ready to start.
REMEMBER TO SAVE OFTEN
Step 1:
Open the Template, Bow, Heart Hanger and your tubes in PSP. Minimize all but your Template.
Activate your Template and make sure you are on the Frame layer.
Set Foreground to a light colour from your tube and tick your texture box. Select a texture of your choice.

Select your Magic Wand with the settings shown below and click on all the white areas on the template holding down your shift key to select all areas.
*NOTE* Make sure you click between the 2 curved lines towards the bottom.
Fill this area with your textured colour.
Deselect.
Step 2:
Use your Magic Wand with the same settings as above click inside all the light gray areas holding down your shift key to select all areas.
Add a new raster layer and fill with a darker colour from your tube.
The darker the colour the more the animation will show.
Deselect.
Add the following Drop Shadow
Vertical & Horizontal: 1
Opcity: 57
Blur: 2
Colour: Black
Click on the Frame layer to activate it.
Use your Magic Wand with the same settings as above click inside all the dark gray areas holding down your shift key to select all areas.
Add a new raster layer and fill with a medium colour from your tube. Leave selected and add some brushes in a lighter colour.
Deselect.
Add the same Drop Shadow we used earlier.
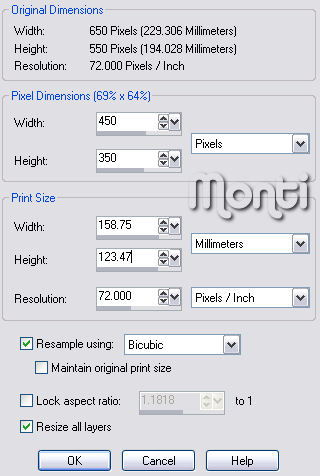
Go to Image - Resize with the following settings.
Add a new Raster layer. Name it background, flood fill with white and send to the bottom of the canvas.
Step 3:
Maximize the 4 tubes you wish to use.
On your Template activate the Frame layer.
Select your Magic Wand with the same settings as earlier and click inside one of the 4 blank frames.
Go to Selections - Modify - Expand by 2.
Copy and paste your first tube as a new layer and position it so you can see the part you want showing in the frame. Resize if neccessary.
Selections - Invert and press delete on your keyboard. Deselect.
Go to Effects - Xero Porcelain and apply with the following settings

Move this layer below your Frame layer.
Repeat until all the 4 frames are filled.
Make sure all 4 tube images are moved below the Frame layer.
Activate your Frame layer and add the following Drop Shadow
Vertical & Horizontal: 1
Opcity: 57
Blur: 2
Colour: black
Repeat but change the Vertical and Horizontal to minus 1.
Hide your background layer and merge all visible. Unhide background layer.
Step 4:
Click on the top layer of your Template to activate it.
Open the Heart Hanger, activate the Crystal Heart layer and colourize it to match your tag. Delete the background layer and merge all visible.
Copy and paste this as a new layer on your Template and position it on the top left.
Add the following drop shadow
Vertical & Horizontal: 0
Opcity: 30
Blur: 9
Colour: Black
Open your Bow tube and click on the middle layer to activate it. Resize it by 25% - Weighted Average checked. Copy and paste on your Template.
Colourise to match your tag. Duplicate the Bow and go to Image - Mirror.
Apply the same Drop Shadow we used for the Heart Hanger to the Bow layers.
Select your font and add your name using a contrasting colour of your choice making sure Vector is checked.
The size depends on what font you use. I used Starstruck with the following settings.

Position your name in the light textured area of your tag. Use your nodes to position it.
Apply your favourite Inner Bevel or Eye Candy Glass preset.
Add a Drop Shadow of your choice.
Add the artists copyright and your watermark.
Step 5:
Open Animation Shop.
In PSP unhide the layer called 2. Go to Edit - Copy Merged and paste in Animation Shop.
Back in PSP hide layer 2 and unhide layer 3. Edit - Copy Merged and paste after current frame in Animation Shop.
In PSP hide layer 3 and unhide layer4. Edit - Copy Merged and paste after current frame in Animation Shop.
In PSP hide layer 4 and unhide layer5. Edit - Copy Merged and paste after current frame in Animation Shop.
In PSP hide layer 5 and unhide layer6. Edit - Copy Merged and paste after current frame in Animation Shop.
In PSP hide layer 6 and unhide layer7. Edit - Copy Merged and paste after current frame in Animation Shop.
Go to Edit - Select all and change the Frame Properties to 15.
Save as a .gif.
No comments:
Post a Comment