
This tutorial was written by Monti. You may print out this tutorial for your own personal use, but please do not copy it in any way to put online, pass out or rewrite without my permission or worse yet attempt to claim as your own.
This was written for psp 9 but will work in other versions.
For this tutorial you will need
Paint Shop Pro
Animation Shop
A Preset Shape or Ding Font of your Choice
My Supplies
This zip file contains my Line Style, my Colour Chart and My Twink. Download *HERE*.
Open the Twink in Animation Shop, place the MontiBlingLine.PspStyledLine in your PSP Styled Lines folder, then open PSP and open the Colour Chart in PSP.
NOTE: If for some reason the Line Style doesn't show up in your psp, don't worry I will tell you how I made it so you should be able to make your own.
Step 1: Making a Line Style.
Open a blank canvas in PSP.
While on your Preset Shape change your Line Style to Dot and then click on Custom at the bottom as shown below.

In the next box that opens click the arrow indicated in the image below and move it over to the right so it is below the number 5.
NOTE: These are the settings I used in PSP 9, you might have to play with them in other versions.
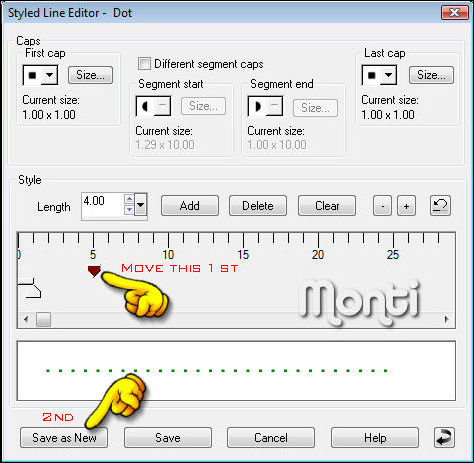
Save As NEW. I called mine MontiBlingLine.
To use it just find it in your Line Styles Drop Down box.
Step 2:
In Animation Shop open the Twink.
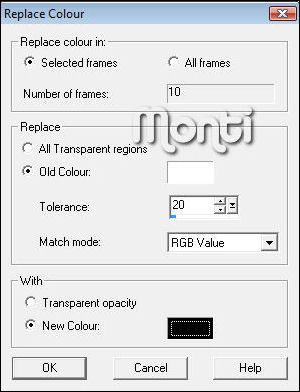
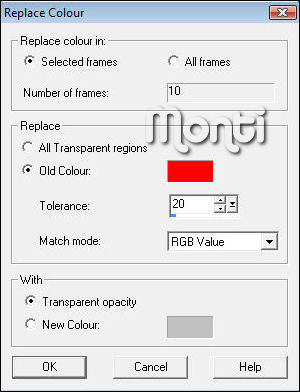
If you want it to be a different colour to white then to go Edit - Select All - Animation - Replace Colour
Use the settings shown below but change the new colour to whatever colour you want your bling to be.
Once you have done that go back to PSP.
Open a new transparent image 250 x 250 pixels.
Set your Foreground to Black and your Background to Null - Line Width: 2 - Line Style: MontiBlingLine.
Using your Preset Shape or a Ding Font of your choice draw a shape on the canvas about 200 x 200 pixels in size - for the purpose of this tutorial I am using a simple heart shape.
Go to Objects - Align - Center in Canvas and then convert to Raster layer.
Now you could just place the twinks on top of that in order but I always found that because they were all the same colour it got confusing and I kept losing count so I found a much easier way.
Step 3:
Open my Colour Chart and set your Paintbrush to Round - Size: 4 - Colour 1 on the colour chart.
Add a new raster layer onto your shape canvas.
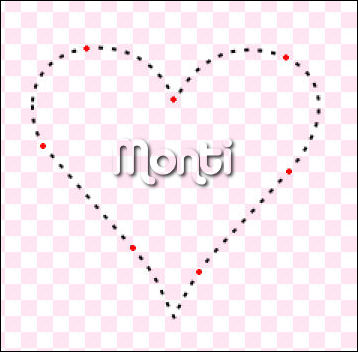
Zoom in close and start at the top center of your shape and paint a red dot over the black dot where you are starting as shown below.

Counting the red dot you just did as number 1 count your way round the dots until you get to dot 11.
Paint a red dot over that dot too.
Continue round doing the same thing until it looks like the one below.
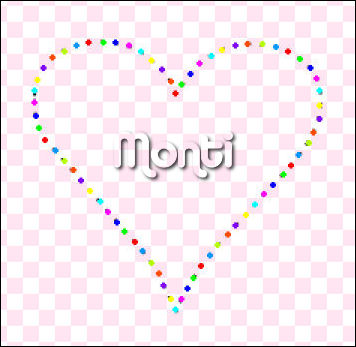
Change your Paintbrush to colour 2 on the colour chart and paint a green dot after each of the red ones.
Carry on like this in colour order until you have painted over all the black dots.
Do NOT worry if you have an area where you can't fit all the 10 colours in it really doesn't matter.
Once you have done this it will look something like the one below.
Now delete the bottom black dot layer and copy MERGED and paste your coloured dots image into Animation Shop.
You must copy merged otherwise the space around the outside is cropped off.
Step 4:
In Animation Shop duplicate your dotted shape image until you have 10 frames then go to Edit - Select All.
Zoom in on the 1st frame.
Activate your Twink image making sure all frames are selected.
Copy the Twink and activate your dotted shape image.
Go to Edit - Paste into Selected Frame and place it over the number 1 (Red) dots.
Repeat the paste until all the red dots are covered - make sure you do the red ones and not the orange ones.
As this is the 1st set of twinks you can still count the spaces if you need to. It doesn't matter if some of the red or other colours show over the edge we will get rid of that later.
Once all the red dots are covered go back to your twink image.
Click on the 1st frame to activate it and go to Edit - Cut. Right click on Twink frame 9 to activate it and choose Paste after Current Frame.
Go to Edit - Select All - Edit - Copy.
Back on your dotted shape image make sure all frames are still selected and go to Edit - Paste into Selected Frame covering all of the number 2 (Green) dots.
Repeat the paste until all the green dots are covered.
Once all the green dots are covered go back to your twink image.
Click on the 1st frame to activate it. Go to Edit - Cut then click on frame 9 to activate it and go to Edit - Paste after Current Frame.
Go to Edit - Select All - Edit - Copy.
Back on your dotted shape image make sure all frames are still selected and and go to Edit - Paste into Selected Frame covering all of the number 3 (Blue) dots.
Once all the blue dots are covered go back to your twink image.
Click on the 1st frame to activate it. Go to Edit - Cut then click on frame 9 to activate it and go to Edit - Paste after Current Frame.
Go to Edit - Select All - Edit - Copy.
Back on your dotted shape image make sure all frames are still selected and and go to Edit - Paste into Selected Frame covering all of the number 4 (Pink) dots.
Carry on doing this - remembering to cut the 1st frame of the Twink image and paste after frame 9 - until all colours are covered by the twinks.
Step 5:
Once you have done that and covered every dot with a twink frame you will notice we still have some of the coloured dots showing.
Open the Colour chart in animation shop.
Make sure all Frames of your dotted shape are still selected then go to Animaton - Replace Colour.
On the Replace colour click on the colour box to open it and then with your dropper click on colour 1 on the colour chart press ok.
In the bottom box change it to Transparency as shown below.
Repeat this step with every colour on the Colour Chart.
Step 6: Testing
As the bling is white on a transparent canvas you can't really see it to see if you are happy with it so once again use the Animation - Replace Colour but this time in the Replace set it to Transparent and set the bottom box to black.
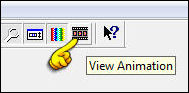
Click on View Animation.
If you are happpy with it go back to Animation - Replace Colour.
In the Replace section change the old colour box to black and in the bottom section choose white or whatever colour you want the bling to be.
Click ok.
Save your bling as a .gif or an .mng file.
Congratulations on making your first Bling, with a bit of practice you will be turning every shape into a Bling.

BECAUSE I LIKE BLING ALSOT I AM GOING TO TRY YOUR TUTORIAL.... I WILL GET BACK WITH YOU WHEN I AM SUCCESSFUL-- THANK YOU SO MUCH FOR TEACHING
ReplyDeleteI MEANT TO WITE ALOT
ReplyDelete