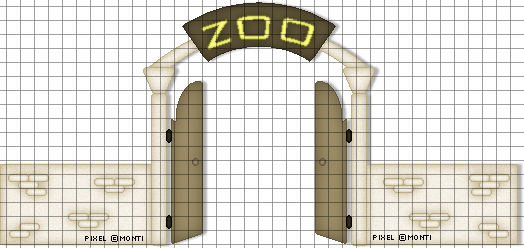
This tutorial was written by Monti on October 10th 2009. It's concept is copyrighted to Monti. Any creation you make from my ideas are yours. You may print out this tutorial for your own personal use, but please do not copy it in any way to put online, pass out or rewrite without my permission or worse yet attempt to claim as your own.
For this tutorial you will need
Paint Shop Pro
The Following Colour Chart
Save and open in PSP.
This colour chart is just a guide, feel free to use whatever colours you want.
Ok we are ready to start.
REMEMBER TO SAVE OFTEN
Step 1: - Outline
Because this is quite a complicated outline I decided not to split the main image into pieces and needed to make the count quite large.
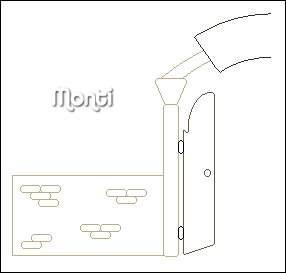
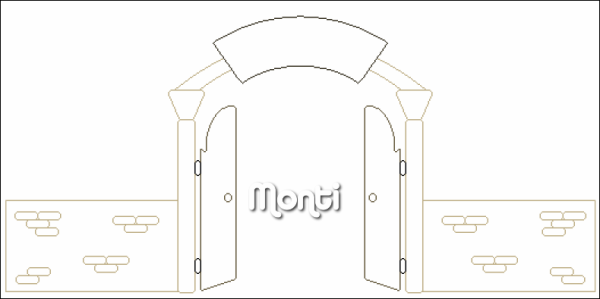
Because of this I can't load it onto this page so please click the small image below which will open the main count. Right click and save this and open in PSP.
To help you keep count of what you have done you can add a new layer to the count in PSP and draw a line through the pixels you have drawn to keep your place.
To make this easier I have numbered all pixels over 1.
Open a new image 700 x 400 transparent.
Flood fill with white so you can see what you are working on. Delete this layer at the end.
Turn the grid on so you can see the single pixels by going to View - Grid - then View - Change Grid, Guide and Snap Properties. Under Current Image Settings change the Horizontal and Vertical grids to 1.
Add a new Raster Layer and name Outline.
Select the brush tool with the following settings.
Size: 1 - Hardness, Opacity and Density: 100
Zoom in to about 800% - 1000%
Change colours as you go as indicated on the outline chart.
The top of the arch is colour 1 (#332D1D), the narrower arch, the pillars and the wall are colour 2 (#BDAD84), the hinges are colour 3 (#000000) and the doors are colour 4 (#63583B) on your colour chart.
We will be starting with the top of the arch.
Set your foreground to colour 1 (#332D1D) on the colour chart and start drawing the outline.
You can move it later if you need to.
When you have completed the outline, move it over to the left side of your canvas, duplicate this layer and go to image - mirror.
Line the edges up to form the full outline shown below.
Hide the white background layer and merge visible.
Step 2:
When you have completed the main outline and merged it, unhide the white background layer again.
Add a new raster layer and using the count shown below and colour 7 (#727120) on your colour chart or a colour of your choice draw in the word Zoo as shown below.
Hide your white background layer again and merge visible.
Rename Outline.
Step 3: - Fills
When all of your outline is complete, select your magic wand with the following settings and click inside the top of the arch, outside the lettering but making sure you select the center of the O's.
Add a new raster layer called Fill and move this beneath your outline layer in the layer palette.
Select colour 4 (#63583B) on your colour chart, click on the Fill layer to activate it and flood fill that selection.
Keep selected.
Selections float, Effects 3D effects, Cutout with the following settings
Vertical: 0
Horizontal: 0
Opacity: 100
Blur: 15
Shadow colour: Use your outline, colour 1 (#332D1D) on your colour chart.
Make sure fill interior with colour is UNchecked.
Deselect.
____________________
Select your magic wand and making sure you are on the outline layer click inside the Z of the word zoo.
Select colour 8 (#FFFF80) on your colour chart or a lighter shade of the colour you used for the outline, click on the Fill layer to activate it and flood fill that selection.
Keep selected.
Selections float, Effects 3D effects, Cutout with the following settings
Vertical: 0
Horizontal: 0
Opacity: 100
Blur: 3
Shadow colour: Use your wording outline in my case colour 7 (#727120).
Make sure fill interior with colour is UNchecked.
Deselect.
Repeat this cutout for the two O letters.
____________________
Select your magic wand and making sure you are on the outline layer click inside the left thin part of the arch.
Select colour 5 (#F5F0E5) on your colour chart, click on the Fill layer to activate it and flood fill that selection.
Keep selected.
Selections float, Effects 3D effects, Cutout with the following settings
Vertical: 0
Horizontal: 0
Opacity: 100
Blur: 10
Shadow colour: Use your arch outline colour 2 (#BDAD84).
Make sure fill interior with colour is UNchecked.
Add Noise - Uniform and Monochrome checked at 4%.
Deselect.
Repeat for the right thin part of the arch.
____________________
Select your magic wand and making sure you are on the outline layer click inside the left arch support.
Select colour 5 (#F5F0E5) on your colour chart, click on the Fill layer to activate it and flood fill that selection.
Keep selected.
Selections float, Effects 3D effects, Cutout with the following settings
Vertical: 0
Horizontal: 0
Opacity: 100
Blur: 12
Shadow colour: Use your arch outline colour 2 (#BDAD84).
Make sure fill interior with colour is UNchecked.
Add Noise - Uniform and Monochrome checked at 4%.
Deselect.
Repeat for the right arch support.
____________________
Select your magic wand and making sure you are on the outline layer click inside the left pillar.
Select colour 5 (#F5F0E5) on your colour chart, click on the Fill layer to activate it and flood fill that selection.
Keep selected.
Selections float, Effects 3D effects, Cutout with the following settings
Vertical: 0
Horizontal: 0
Opacity: 100
Blur: 13
Shadow colour: Use your pillar outline colour 2 (#BDAD84).
Make sure fill interior with colour is UNchecked.
Add Noise - Uniform and Monochrome checked at 4%.
Deselect.
Repeat for the right pillar.
____________________
Select your magic wand and making sure you are on the outline layer click inside the left wall making sure you select all the single pixels inbetween the bricks as shown below.
Select colour 5 (#F5F0E5) on your colour chart, click on the Fill layer to activate it and flood fill that selection.
Keep selected.
Selections float, Effects 3D effects, Cutout with the following settings
Vertical: 0
Horizontal: 0
Opacity: 100
Blur: 14
Shadow colour: Use your wall outline colour 2 (#BDAD84).
Make sure fill interior with colour is UNchecked.
Add Noise - Uniform and Monochrome checked at 4%.
Deselect.
Repeat for the right wall remembering to select all the stray pixels.
____________________
Select your magic wand and making sure you are on the outline layer click inside one of the bricks.
Select colour 5 (#F5F0E5) on your colour chart, click on the Fill layer to activate it and flood fill that selection.
Keep selected.
Selections float, Effects 3D effects, Cutout with the following settings
Vertical: 0
Horizontal: 0
Opacity: 100
Blur: 4
Shadow colour: Use your brick outline colour 2 (#BDAD84).
Make sure fill interior with colour is UNchecked.
Add Noise - Uniform and Monochrome checked at 4%.
Deselect.
Repeat for the rest of the bricks.
____________________
Select your magic wand and making sure you are on the outline layer click inside one of the hinges.
Select colour 1 (#332D1D) on your colour chart, click on the Fill layer to activate it and flood fill that selection.
Keep selected.
Selections float, Effects 3D effects, Cutout with the following settings
Vertical: 0
Horizontal: 0
Opacity: 100
Blur: 3
Shadow colour: Use your hinge outline colour 3 (#000000).
Make sure fill interior with colour is UNchecked.
Deselect.
Repeat for the other 3 hinges.
____________________
Select your magic wand and making sure you are on the outline layer click inside the left gate.
Select colour 6 (#A0906A) on your colour chart, click on the Fill layer to activate it and flood fill that selection.
Keep selected.
Selections float, Effects 3D effects, Cutout with the following settings
Vertical: 0
Horizontal: 0
Opacity: 100
Blur: 25
Shadow colour: Use your door outline colour 4 (#63583B).
Make sure fill interior with colour is UNchecked.
Deselect.
Repeat for the right door.
____________________
Select your magic wand and making sure you are on the outline layer click inside the left gate handle.
Select colour 6 (#A0906A) on your colour chart, click on the Fill layer to activate it and flood fill that selection.
Keep selected.
Selections float, Effects 3D effects, Cutout with the following settings
Vertical: 0
Horizontal: 0
Opacity: 100
Blur: 3
Shadow colour: Use your door outline colour 4 (#63583B).
Make sure fill interior with colour is UNchecked.
Repeat cutout.
Deselect.
Repeat for the right door handle.
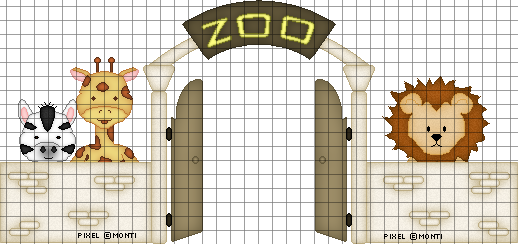
Hide the white background layer and save as a psp file so that you can add any animals to it at a later date.


No comments:
Post a Comment