

This tutorial was written by Monti on August 26th 2008. It's concept is copyrighted to Monti. Any creation you make from my ideas are yours. You may print out this tutorial for your own personal use, but please do not copy it in any way to put online, pass out or rewrite without my permission or worse yet attempt to claim as your own.
This was written for psp 9 but will work in other versions.
For this tutorial you will need
Paint Shop Pro
A Font of your Choice
I used FairyDust available HERE.
Tube of your Choice
I am using the wonderful art of Suzanne Woolcott.
Unfortunately Suzanne is no longer selling her work so please use an artist you have permission for.
A Scrap Kit of Choice
I am using my Starry Starry Night Scrap kit which is available to purchase at Taggers Delight
Masks of your Choice
I am using Becky's Mask 22 (formerly Secrets of the Imagination) Download HERE.
I am using WSL-Mask29 by Wee Scots Lass, thank you Chelle
Download HERE.
Place in your mask folder.
Ok we are ready to start.
REMEMBER TO SAVE OFTEN
Step 1:
Open a new 500 x 500 pixel image.
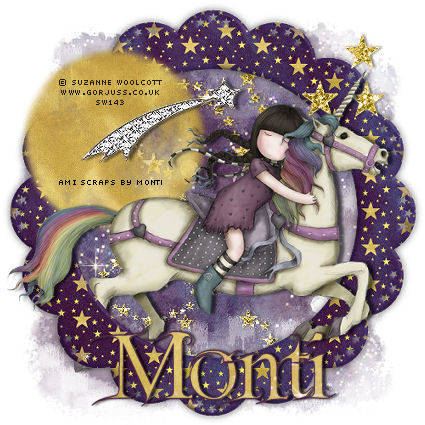
Copy and paste one of the darker papers onto your canvas - I used Monti-SSN-Paper-Blue3-StarTrail.jpg.
Go to Layers - Load/Save Mask - Load Mask from Disk and apply Beckys Mask 022 with the following settings.
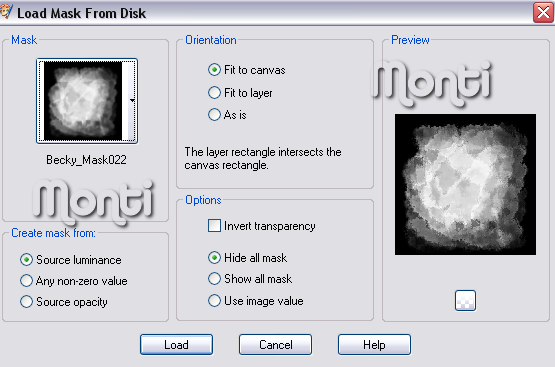
In the layer palette right click on the mask layer Merge Group. Rename Mask.
Step 2:
Copy and paste a frame of choice as a new layer - I used Monti-SSN-StarFrame2-Blue3-Starry.png.
Go to Image - Resize - 85% Bicubic selected - ALL Layers UNchecked.
Rename this layer Frame.
Copy and paste one of the yellow papers as a new layer - I used Monti-SSN-Paper-Yellow1.jpg.
Go to Layers - Load/Save Mask - Load Mask from Disk and apply WSL-Mask29 with the same settings we used earlier.
In the layer palette right click on the mask layer Merge Group.
Duplicate the top mask layer 3 times for a total of 4.
Hide all layers apart from the top 4 mask layers and go to Layers - Merge - Merge Visible.
Rename Mask 1.
Unhide all layers.
Still on the Mask 1 layer go to Image - Resize - 65% Bicubic selected - ALL Layers UNchecked and move to the top left of the image.
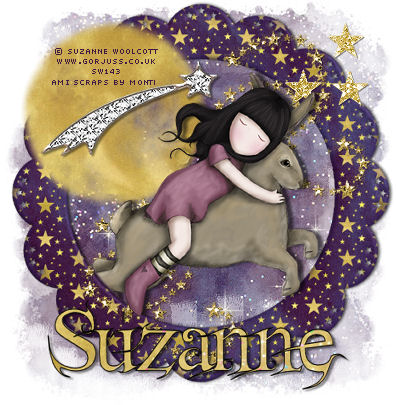
Use my tag for a guide.
Step 3:
Copy and paste your tube as a new layer and resize if needed. I resized mine by 75% Bicubic - ALL Layers UNchecked.
Add a Drop Shadow of your choice. I used
Vertical: 0
Horizontal: 6
Opacity: 60
Blur: 5
Colour: Black
Click on your frame layer to activate it and go to Selections - Select All - Float - Defloat.
Click on your tube layer to activate it and select your Eraser tool - size 30.
Erase the rear legs of the unicorn taking care not to erase the tail.
The selections will prevent you from erasing any area not over the frame.
Deselect.
Click on your frame layer to activate it and add a Drop Shadow. I used
Vertical: 0
Horizontal: 0
Opacity: 60
Blur: 13
Colour: Black
Add any other elements you want from the kit and add a subtle Drop Shadow to each element used.
Resize if needed and add the artists copyright.
Step 4:
Select a font of your choice - I used Fairydust.
Set your Foreground to a dark colour from the frame - I used #472146 - and the background to one of the yellow papers from the kit - Monti-SSN-Paper-Yellow1-StarTrail.jpg - Font size: 72.
Type your name and click apply.
Go to Objects - Align - Horizontal In Canvas and convert to Raster layer.
Add the following Drop Shadow
Vertical: 0
Horizontal: 3
Opacity: 70
Blur: 3
Colour: Black
Save your finished tag.
No comments:
Post a Comment