


This tutorial was written by Monti on April 8th 2007 and reworked on 17th October 2014. It's concept is copyrighted to Monti. Any creation you make from my ideas are yours. You may print out this tutorial for your own personal use, but please do not copy it in any way to put online, pass out or rewrite without
my permission or worse yet attempt to claim as your own.
This was written for psp 9 but will work in other versions.
For this tutorial you will need
Paint Shop Pro
Animation Shop
Eye Candy 5 - Textures
Brick wall - Optional
Animal Fur - Optional
My Supplies
This includes the Brick Wall pattern and the bath mat for anyone who doesn't have Eye Candy 5 and my Edge Circle Mask.
You can download them at the link below
A Font of your choice
I used HW stone
A Tube of your choice
I am using the wonderful art of Suzanne Woolcott.
Unfortunately Suzanne is no longer selling her art so please use an artist you have permission for.
Ok we are ready to start.
REMEMBER TO SAVE OFTEN
Step 1:
Open my mask and the tube of your choice in psp and minimize. If you don't have Eye Candy 5 then open the Brick Wall pattern and the bath mat in psp too.
Open a new 500 x 500 pixel image. Flood fill with White.
Add a new Raster layer name it Tiles.
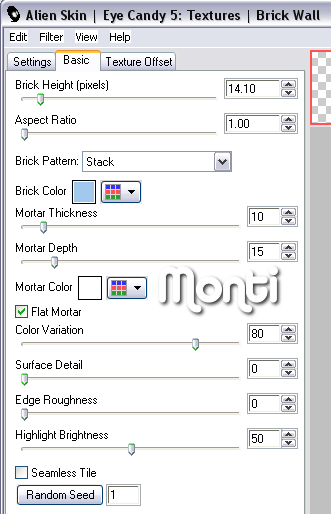
Go to Effects - Eye Candy 5 Textures - Brick Wall.
Under settings choose Tile and Grout - Small.
Under Basic use the settings shown below. Change the colour to a colour from your tube.
If you don't have Eye Candy 5 copy and paste my Brick wall Pattern as a new layer. Lower the opacity of the Tiles layer to about 68.
Go to Layers - New Mask Layer - From Image and find the EdgeCircleMask.jpg in the drop down box.
Make sure Source Luminence is checked and apply.
Merge group.
Copy and paste your tube as a new layer and resize if neccessary.
Add the following Drop Shadow
Vertical: 5
Horizontal: 5
Opacity: 40
Blur: 5
Colour: Black
Step 2:
Set your Background colour to a medium colour from your tube. I used #C0DAF5.
Set your Foreground to a slightly darker colour. I used #9DC7EF.
Select your Preset Shapes tool - Elipse.
Create as Vector: checked - Line width: 1.
Draw out an Elipse for the rug. Use my tag as a guide.
Convert to Raster layer.
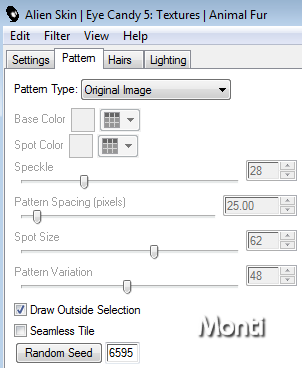
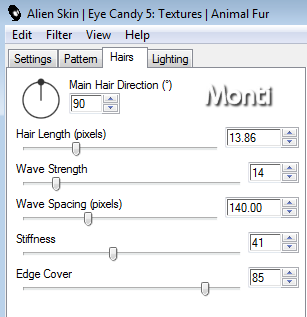
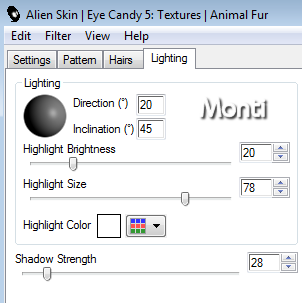
Go to Effects - Eye Candy 5 - Textures -Animal Fur with the following settings.
Move this beneath the tube layer and add the following Drop Shadow
Vertical: 3
Horizontal: 0
Opacity: 30
Blur: 5
Colour: Black
If you wish to resize your tag do it now. I resized mine by 75% - Weighted Average.
Add a new raster layer and add your artists copyright.
Add your name using a font of your choice.
Convert to Raster layer and add the same Drop Shadow we used on the rug.
Step 3: Animation
Add a new raster layer and move it to the top of the layer palette.
Select your Lasoo tool set to Point to Point - Feather 15 and draw around the area you wish the bubbles to appear in.
Add a new Raster layer.
Go to Effects - Artistic Effects - Balls and Bubbles with the following settings.
Under Presets at the top, select Clear Bubbles.
On the first Screen under Shape use the following settings

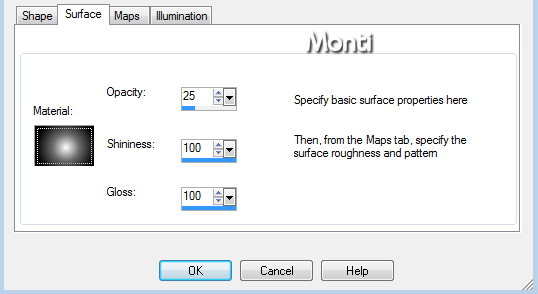
Click the Surface box and use the following settings.
Click the Maps box and use the following settings.

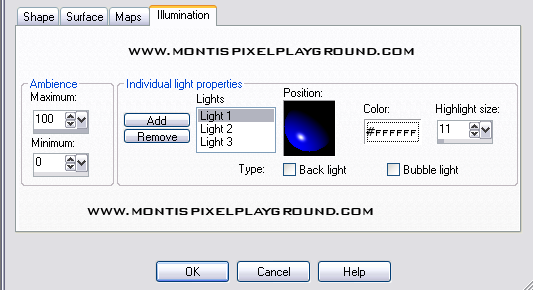
Click the Illumination box and Click the Add button under Lights to add 3 lights.
Use the following settings.
Note: Click on the Position and drag to get the lighting angle right.
Light 1:
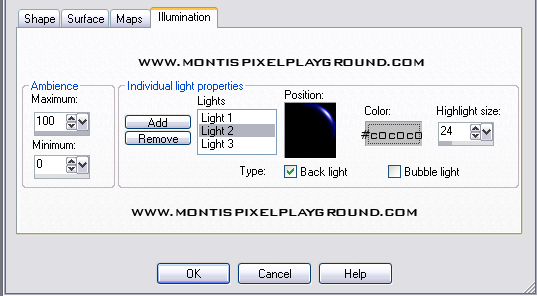
Light 2:
Light 3:
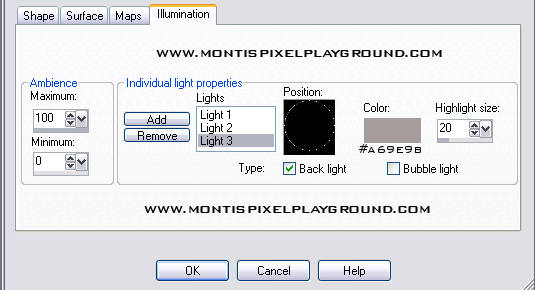
Then click ok to apply.
Do NOT Deselect.
Add a new Raster layer and apply Balls and Bubbles again but click on the Random Seed.
Do NOT Deselect.
Add a new Raster layer and apply Balls and Bubbles again but click on the Random Seed.
Deselect.
Step 4:
Open Animation Shop.
Back in PSP hide the top 2 bubble layers and go to edit copy merged.
Back in Animation Shop, paste as a New Image.
Back in PSP hide bubbles layer 1 and unhide bubbles 2.
Copy merged and paste after current frame in Animation Shop.
Back in PSP hide bubbles layer 2 and unhide bubbles 3.
Copy merged and paste after current frame in Animation Shop.
Go to Edit - Select All and change the Frame Properties to 24.
Save as a gif.
No comments:
Post a Comment