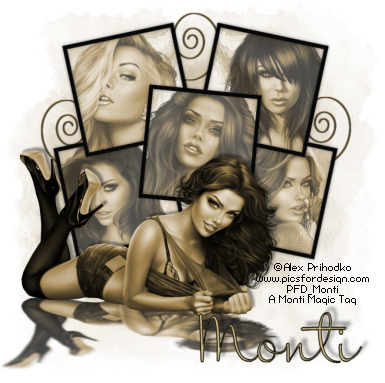
This tutorial was written by Monti on July 5th 2007. It's concept is copyrighted to Monti. Any creation you make from my ideas are yours. You may print out this tutorial for your own personal use, but please do not copy it in any way to put online, pass out or rewrite without my permission or worse yet attempt to claim as your own.
This was written for psp 9 but will work in other versions.
For this tutorial you will need:
Paint Shop Pro
Eye Candy 5 - Impact - Perspective Shadow
Supplies
Download Here
This includes the Brush I used, my Frame and Melissa's Spiral Clip.
Thanks to Melissa from Scrappy Expressions for the Spiral Clip.
Install the Brush in PSP and open the Frame and Clip in PSP.
The Fuzz Soft Brush I used came with my PSP 9 but I have supplied it for those of you using different versions.
Mask
I used Becky_Mask022 by Becky formerly Secrets Of The Imagination
This is included in the supplies above.
Unzip and place in your Mask folder.
Fonts of Choice
I used Mrs Blackfort which is a Pay Font so I cannot supply.
6 Tubes of Choice
Make sure they are all by the same artist and it is preferable to have at least one horizontal tube.
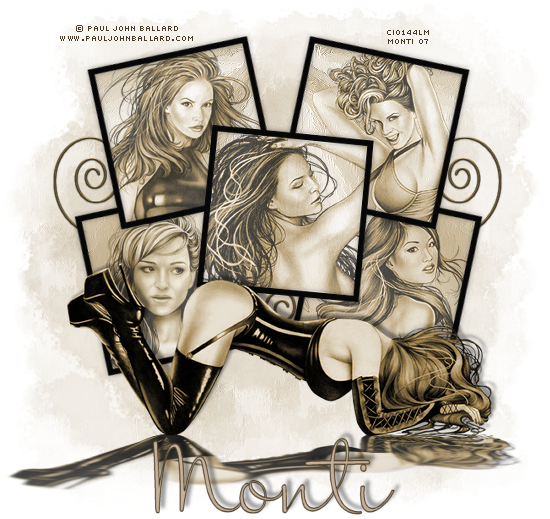
I am using the wonderful art of Paul John Ballard used with a license from CILM.
Ok we are ready to start.
REMEMBER TO SAVE OFTEN
Step 1:
Open the tubes in PSP. Press Shift D to duplicate them and close the originals.
On the first tube go to Adjust - Hue and Saturation and change the Hue - 28 and the Saturation - 84.
Repeat for the other artist tubes.
Open a New Image 700 x 700 and flood fill with white. We wil resize this later.
Copy and paste my Frame as a new layer and use your mover tool to move it upwards slightly. Rename Frame.
Select your Magic Wand with the following settings:
Click inside each of the frames. Once all areas are selected go to Selections - Modify - Expand by 3.
Add a new Raster Layer and move it below the frame layer.
Rename Inner Frame.
Set your Foreground to #C6B492 and your Background to #F5F1EA
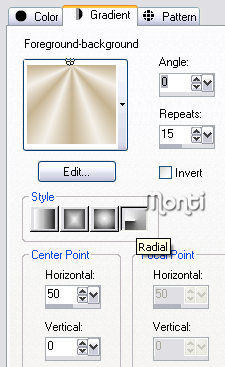
Change the Foreground to Gradient - Foreground/Background - Radial - with the following settings:
Fill the Inner Frame selections with this gradient.
DO NOT Deselect.
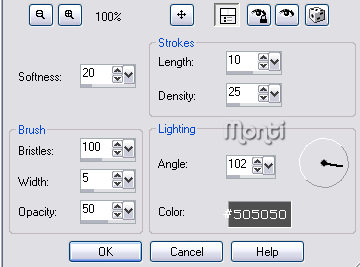
Go to Art Media Effects - Brush Strokes with the following settings:
Colour is #505050
Deselect.
Step 2:
Activate the Frame layer and with your Magic Wand click inside the centre frame. Go to Selections - Modify - Expand by 2.
Copy and paste one of the tubes onto the canvas and position it so the part you want showing is inside the selections.
Once happy with the positioning go to Selections - Invert and press delete on your keyboard.
Deselect and move this below your Frame layer.
Repeat this process with the other tubes until all Frames are filled.
Hide the Background, Inner Frame and Frame layers and merge the tubes visible.
Rename Frame Tubes and lower the Opacity to 68.
Unhide the other layers.
Activate the Frame layer and add the following Drop Shadow
Vertical: 0
Horizontal: 0
Opacity: 40
Blur: 9
Colour: Black
Copy and paste the last (horizontal) tube as a new layer and position. See my tag for reference.
Add the following Drop Shadow
Vertical: -5
Horizontal: 5
Opacity: 40
Blur: 5
Colour: Black
Go to Effects - Eye Candy 5 - Impact - Perspective Shadow
Under Settings choose Reflect in Front - Sharp.
Move the nodes so that the reflection actually touches the original tube and press ok.
If the Perspective shadow goes off canvas, then go to Image - Canvas Size -Resize to 700 x 800 pixels.
Step 3:
Activate the Background layer and add a new Raster Layer. Fill with #E9E1D4.
Change your Foreground to #C4B494 and select your Fuzz-Soft brush.
Size - 240, Opacity - 100 and apply the brush randomly on the layer you just filled.
NOTE
You will need to click several times to get it to show but don't make it too dark.
Change your Foreground to #A79167.
Change the size of the Fuzz-Soft brush to 152 and apply randomly again in the slightly darker colour on the same layer.
Once you are happy with it go to Effects - Art Media Effects - Brush Stokes and apply with the same settings we used earlier.
Go to Layers - Load/Save Mask - Load from Disk and select Becky_Mask022 - Source Luminence - Fit to Canvas - Hide All Mask and apply.
Go to Layers Merge Group.
Click on the top layer to activate it.
On the SE_Tranquility_SpiralClip_1 go to Adjust - Brigthness/Contrast.
Change the Brightness to -41 and the Contrast to 19 then colourize with the same settings we used on the tubes.
Copy and paste the SE_Tranquility_SpiralClip_1 as new layer onto the canvas.
Move into position on the left of the frames. Use my tag as a guide.
Duplicate this layer and go to Image - Mirror.
Click on the original Spiral layer and duplicate again.
Move into position between the top frames.
Close off all layers apart from your Spiral layers and Merge Visible.
Move this layer down so it is just above your Group (Mask) layer.
Unhide all layers apart from the white background layer.
Select your Crop tool and Crop to size.
Step 5:
If you wish to resize your Image please do so now, making sure All Layers is Checked.
I resized mine by 59%. I like smaller tags.
Add the artists copyright and your watermark.
Add your name using a font of your choice.
Foreground - #1D1A11 - Background - #CABA87 and add the following Drop Shadow
Vertical: -5
Horizontal: 5
Opacity: 40
Blur: 5
Colour: Black
Save.


Just gorgeous-thanks for sharing this
ReplyDeleteEvita