Showing posts with label Jamie Kidd. Show all posts

Monday, 20 October 2014

Chocolate Valentine


This tutorial was written by Monti on January 25th 2009. It's concept is copyrighted to Monti. Any creation you make from my ideas are yours. You may print out this tutorial for your own personal use, but please do not copy it in any way to put online, pass out or rewrite without my permission or worse yet attempt to claim as your own.

This was written for psp 9 but will work in other versions.

For this tutorial you will need

Paint Shop Pro

Font Of Your Choice 
I used Amaze font.

Tube of your Choice 
I am using the wonderful art of Jamie Kidd and the tube comes with a close up which I used in the center of the heart. 
I bought mine from CILM but you can now purchase a license to use her art work from CDO. Do not use the same tube without a license to do so.

My Chocolate Valentine Scrap 
This is available from Taggers Delight
This is a huge kit with just under 500 pieces in it so you get loads for your money.

Lokas Software - 3d Shadow - Optional
Available HERE.

My Lipstick - Made exclusively for this tut.
Download HERE
Do not share this or use in any other tut without my permission.

Ok we are ready to start.

REMEMBER TO SAVE OFTEN

Step 1:
Open a new transparent image 500 x 500 pixels.
From my kit open Monti-ChocolateValentine-Heart-Brown.png (in the Other Elements folder).
Copy and paste it onto the canvas.
Go to Image - Resize: 65% - Smart Size - All layers UNchecked. 
Rename this layer HeartBrown.
From the same folder open Monti-ChocolateValentine-HeartBox3.png.
Copy and paste as a new layer over your brown heart.
Resize with the same settings used above.
Add the following Drop Shadow
Vertical: 0
Horizontal: 0 
Opacity: 85 
Blur: 10 
Colour: Black 
Rename HeartPink.

Step 2:
Activate the Preset Shapes tool and set it to Heart 1.
Set your Foreground to Null and your background to Black. 
Draw a heart shape that more or less covers the inside of the heart box as shown below.
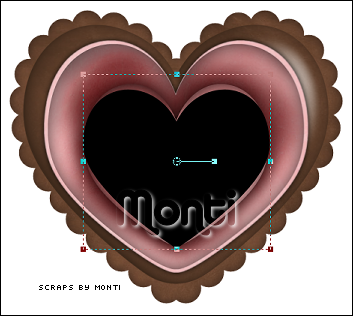
As you can see it doesn't have to fit exactly.
When you are happy with the placement Convert to Raster layer and go to Selections - Select All - Float. 
Go to Selections - Modify - Feather - 55.
Selections - Invert.
Open the close up of the tube. If you are using the same tube I am you need layer two. 
Copy and paste the close up as a new image and go to Image - Mirror. 
Copy and paste the mirrored image as a new layer onto your canvas. Rename Tube.
Move it so the part you want to see is in the middle of the selection.
Making sure you are on the Tube layer press delete on your keyboard 3 or 4 times until you are happy with the look of the tube.
Delselect and delete the black heart layer. 
With all layers visible use your crop tool to crop your image by clicking on Merged Opaque. This will just get rid of any excess tube left over.

Step 3:
Go to Image - Canvas Size and increase it to 600 pixels width and height and center placement. 
Open one of my Heart Trails from the kit (Other Elements folder) I used Monti-ChocolateValentine-HeartTrail-PinkBrown.png.
Copy and paste it onto the canvas. 
Go to Image - Resize and resize by 50%.
Position it to the right of your hearts - see my tag as a guide. 
Move this layer below the HeartPink layer. 
Duplicate the Heart Trail layer and go to Image - Mirror.
Add the following Drop Shadow to each of the heart trail layers.
Vertical: 0
Horizontal: 0 
Opacity: 30 
Blur: 3 
Colour: Black

In the layer palette click on the top Heart Trail layer to activate it and then right click and choose Merge Down.
Rename this layer Heart Trail.

Step 4:
From the kit open Monti-ChocolateValentine-HeartCurtainPink.png.
I wanted to change the colour of the heart hangers to a lighter brown. If you wish to do the same follow the step below.
Activate your Magic Wand set to Tolerance and Feather 0 - Antialias: Checked.
Using your Magic Wand click on one of the heart strings. 
Go to Selections - Modify - Select Colour Range with the following settings:
Tolerance: 0 - Softness: 20 - Add Colour Range: Checked - Reference Colour: Click inside the selected area on the hangers.
Click OK.
Now you can flood fill the area with your colour. I used #6A4731.
Deselect.

On your canvas make sure you are on the top layer - Tube.
Copy and paste the Heart Curtain as a new layer onto your canvas.
Go to Image - Resize - 60% - Smart Size - All layers UNchecked. 
Move it up so you can see your tube under it - see my tag as a guide. 
Rename Curtain.
Click on your HeartPink layer to activate it and with your Magic Wand using the same settings as earlier click on the white area outside the heart. 
Go to Selections - Modify - Expand by 7.
Click back on the Curtain layer and press delete on the keyboard.
Deselect.

Step 5:
Open one of the String Button Bows (from the Bows and Ribbons folder) - I used Monti-ChocolateValentine-ButtonBow3.png.
Copy and paste as a new layer onto your canvas.
Resize - 50% - Smart Size - All layers UNchecked and add the following Drop Shadow:
Vertical: 0
Horizontal: 0 
Opacity: 30 
Blur: 3 
Colour: Black
Rename String. 
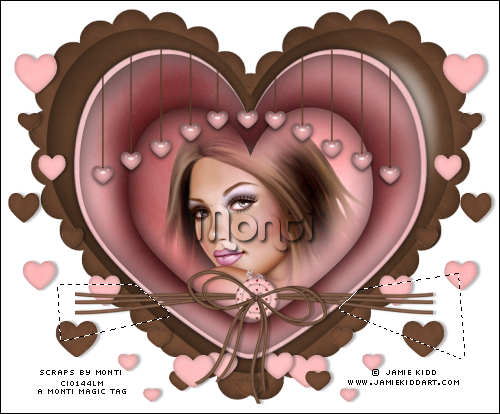
Carefully use your Freehand Selection tool OR your Eraser to erase the extra strings at each edge of the heart.
I just used the Selection Tool and then pressed Delete on the keyboard, it doesn't have to be too accurate.
Step 6:
Now you need to add any extras you want - until you are happy with it. Don't add the main tube yet. 
I will tell you below which ones I added and how I rezized them but feel free to make the tag your own by using whichever elements you desire.

I used the Pink Corset - Monti-ChocolateValentine-Corset-Pink.png resized by 35% - Smart Size - All layers UNchecked.
Move to the right of the tag and add the following Drop Shadow.
Vertical: 0
Horizontal: 4 
Opacity: 30 
Blur: 4 
Colour: Black

Open the Lipstick that you downloaded earlier and copy and paste as a new layer.
Resize by 35% - Smart Size - All layers UNchecked.
Copy and paste and position in front of the corset and add the following Drop Shadow.
Vertical: 0
Horizontal: 0 
Opacity: 75 
Blur: 7 
Colour: Black

Open one of the Heart Hangers - I used Monti-ChocolateValentine-HeartHanger3.png and copy and paste as a new layer.
Resize by 30% - Smart Size - All layers UNchecked.
Move to the left of the canvas and add the following Drop Shadow:
Vertical: 0
Horizontal: 4 
Opacity: 40 
Blur: 4 
Colour: Black

From the Bows and Ribbons folder I used Monti-ChocolateValentine-BeadRibbon6.png.
Copy and paste onto canvas then Resize by 30% - Smart Size - All layers UNchecked.
Place so the center of the bow is in the center top of the large heart hanger and add the following Drop Shadow:
Vertical: 0
Horizontal: 4 
Opacity: 40 
Blur: 4 
Colour: Black

From the Flower folder I used Monti-ChocolateValentine-Daisy-Brown.png and Monti-ChocolateValentine-SunFlower-Pink.png.
Copy the brown Daisy onto the canvas and Resize by 25% - Smart Size - All layers UNchecked.
Move to the top right of the canvas and add the following Drop Shadow:
Vertical: 0
Horizontal: 0 
Opacity: 70 
Blur: 9 
Colour: Black 

Copy and paste the pink Sunflower as a new layer and Resize by 20% - Smart Size - All layers UNchecked.
Add the following Drop Shadow: 
Vertical: 0
Horizontal: 0 
Opacity: 70 
Blur: 9 
Colour: Black 
Duplicate the Sunflower layer and position one either side of the brown Daisy with one on top and one behind. See my tag as a guide.

Step 7:
Once you have all your accessories on the tag and before you add the main tube, hide the white background layer and copy merged.
Unhide the white background layer and paste the merged copy as a new layer above the white background.
Go to Adjust - Blur - Gaussian Blur - 10.
On the blurred layer go to Effects - Texture Effects - Weave with the following settings:
Gap Size: 1 - Width: 6 - Opacity: 1 - Weave Colour and Gap Colour: #F0AFB0 - Fill Gaps: Checked.

Activate the top layer in your layer palette and copy and paste the main tube onto the canvas.
Position it where you want it and add a Drop Shadow.
I used Lokas Software 3D Shadow for mine with the folowing settings.
Blur: 72 - Transparency: 13 - Angle X: -3 - Angle Y: 7 - Angle Z: 0 - Zoom: 100 - Offset X: 8 - Offset Y: 4 - Perspective: 80 
Hide the white background layer and crop to size. I use Merged Opaque. 
If you want to resize your tag do so now. I resized mine 80% - Bicubic - All layers checked. 
Add your artists copyright and license if there is one. 
Add your name using a font of your choice.I used Amaze font.

Save your finished tag.


Saturday, 18 October 2014

Licensed Dominatrix

This tutorial was written by Monti on April 29th 2007. It's concept is copyrighted to me. Any creation you make from my ideas are yours. You may print out this tutorial for your own personal use, but please do not copy it in any way to put online, pass out or rewrite without my permission or worse yet attempt to claim as your own. 

This was written for psp 9 but will work in other versions. 

For this tutorial you will need 

Paint Shop Pro

Xenofex 2 - Burnt Edges

My Supplies - HERE.
All the supplies were made by me, please do not share or change the fle names. 
Unzip and then open the tubes and papers in PSP.
Install the Brush in your brush folder.

Font of your Choice
I used Sandy Text Hmk Bold.

A Tube of your Choice
I am using the wonderful art of Jamie Kidd used with a license from CILM. 
You can purchase a license to use her work from CDO.

Ok we are ready to start. 

REMEMBER TO SAVE OFTEN 

Step 1: 
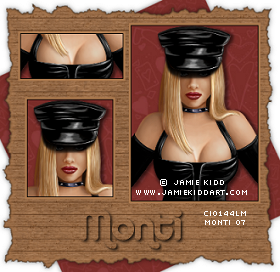
Activate your main tube and press Shift D to make a duplicate. 
Resize the duplicate to about 185 pixels (width) by 255 pixels (height).
Add the following Drop Shadows.
Vertical: 5
Horizontal: 0
Opacity: 50
Blur: 5
Colour: Black 

Vertical: 0
Horizontal: 5
Opacity: 50
Blur: 5
Colour: Black 

Add a new Raster Layer and fill with Monti Heart Paper or a paper of your choice - set to Scale 70. 
Move this layer beneath your tube layer. 
Merge all Visible.
Go to Image - Add Borders and add a 1 pixel Black border.
Then add a 4 pixel border using colour #AB794E.
Set this to one side for now. 

Open a new image about 150 pixels (width) by 65 pixels (height).
Copy and paste the image you just set aside as a new layer and use your mover tool to move it around until you have the part you want showing is in the image. 
Merge all Visible.
Go to Image - Add Borders and add a 1 pixel Black border.
Then add a 4 pixel border using colour #AB794E.
Set this to one side for now. 

Open a new image about 130 pixels (width) by 140 pixels (height).
Copy and paste the first image you just set aside as a new layer and use your mover tool to move it around until you have the part you want showing is in the image. 
Merge all Visible.
Go to Image - Add Borders and add a 1 pixel Black border.
Then add a 4 pixel border using colour #AB794E.
Set this to one side for now. 

Step 2: 
Open a new image 600 x 600 pixels. 
Open the Monti Heart Paper and resize to 360 x 360 pixels, Smart Size and All Layers Checked. 
Copy and paste this as a new layer on your white canvas. 
Go to Image - Rotate - left - 25, making sure all layers is UNchecked.
Add the following Drop Shadow.
Vertical: 0
Horizontal: 0
Opacity: 50
Blur: 10
Colour: Black 

Open the Monti Card Paper, Press Shift D to duplicate. 
Minimize your original as we will need it later and resize the duplicate to 400 x 390 pixels, Smart Size and All Layers Checked. 
Copy and paste this as a new layer on your white canvas. 
Add the same Drop Shadow we used on the other paper. 
Use the mover tool to move it up slightly.

Step 3: 
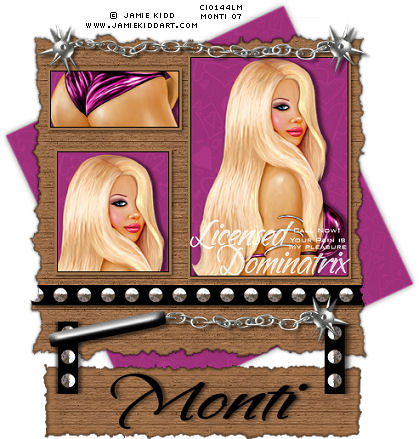
Copy and paste your 3 tube images we made at the start as new layers on your canvas and arrange as shown below. 
Add the following Drop Shadow to each of the tube layers.
Vertical: 2
Horizontal: 2
Opacity: 50
Blur: 5
Colour: Black 

Step 4: 
Copy and paste the MontiStudded.png as a new layer. Resize by 80% - Bicubic selected - All layers UNchecked. 
Move into position just below your tube images. 
Add the same Drop Shadow we used on the tube layers. 
Activate Layer 2 (the Monti Card Paper layer) and select your magic wand, Tolerance 10 - Feather 0 and click on the clear area around the card paper. 
Selections - Modify - Expand by 7. 
Activate the MontiStudded.png layer and press Delete on your keyboard. 

Merge all visible. 
Use your mover tool to move the image up to the top of the canvas. 

Step 5: 
Open a new image 375 pixels (width) by 90 pixels (height).
Copy and paste the Monti Card Paper as a new layer. 
Resize by 80%, All layers UNchecked. 
Select your Crop tool and click on Merged Opaque and Crop. 
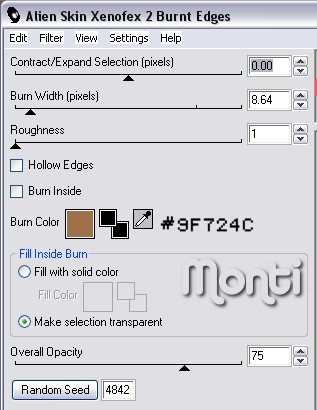
Apply Xenofex 2 - Burnt Edges with the following settings.
Copy and paste this as a new layer onto your canvas and move beneath the main image. See my tag as a guide. 
Add the following Drop Shadow.
Vertical: 0
Horizontal: 0
Opacity: 50
Blur: 10
Colour: Black 

Open the MontiStudded.png and resize by 80%, Bicubic selected, All layers Checked. 
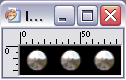
Activate your selection tool, set to Rectangle and select an area that includes three of the studs as shown below.
Copy and Paste this as a new layer on your canvas and Go to Image - Rotate - Right - 90, making sure all layers is UNchecked.
Move it into position so you have one stud on the top image, one stud on the bottom tag area and one stud in the middle. See my tag as a guide. 
Duplicate and Mirror. 
Add the following Drop Shadow to each of these layers. 
Vertical: 2
Horizontal: 2
Opacity: 50
Blur: 5
Colour: Black 

Step 6: 
Copy and paste the SpikeBall as a new layer. Resize by 80%, Bicubic selected, All layers UNchecked. 
Move it so it is below your Studded band. (See my tag as a guide).
Add the same Drop Shadow we used on the tube layers. 

Copy and paste the ChainSpike as a new layer. Resize by 80%, Bicubic selected, All layers UNchecked. 
Move it so it is at the top of the tube images. (See my tag as a guide).
Add the same Drop Shadow we used above. 

Add a new Raster layer and select your Brush tool.
Set your Foreground to White and find the Licensed Dominatrix Brush, set to size 183.
Click once to place it on your tag, I placed mine over the larger tube image. 

Add the artists copyright and your watermark. 
Add your name using a font of your choice, colour Black and place on the hanging tag. 
Add the following Drop Shadow to your name. 
Vertical: 2
Horizontal: 2
Opacity: 50
Blur: 5
Colour: Black 

Crop to size using Merged Opaque and Save.


Monday, 13 October 2014

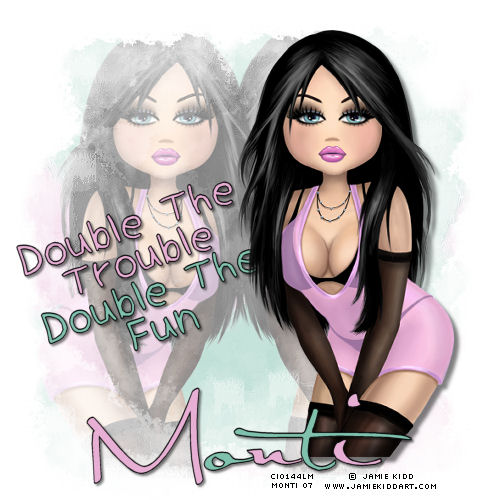
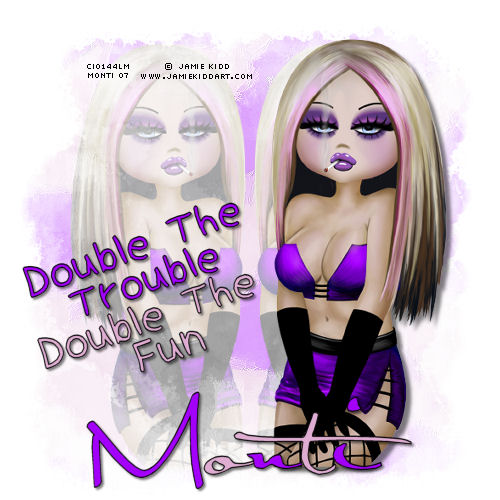
Double Trouble


This tutorial was written by Monti on April 20th 2007. It's concept is copyrighted to me. Any creation you make from my ideas are yours. You may print out this tutorial for your own personal use, but please do not copy it in any way to put online, pass out or rewrite without my permission or worse yet attempt to claim as your own. 

This was written for psp 9 but will work in other versions. 

For this tutorial you will need 

Paint Shop Pro

Mura Meisters Copies
Available from www.oocities.org/murakuma/mmplugins.html

A Tube of your choice
I am using the art of Jamie Kidd used with a license from CILM. If you wish to use her work please visit www.cdoestore.com to purchase a license. 

Fonts of your choice
I used Childish Alpha and Satisfaction 

Beckys Mask 22
Download Here
This was made by Becky (formerly Secrets of the Imagination)
Put the mask in your mask folder.

Ok we are ready to start. 

REMEMBER TO SAVE OFTEN 

Step 1:
Open a new transparent image 500 x 500 pixels. 
Set your Foreground and Background to the same colour from your tube. 
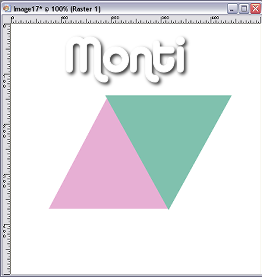
Select your Preset Shapes tool and draw out a shape of your choice. I used a Triangle.
Don't make it too big, see my sample below.
Convert to Raster Layer.

Change your Foreground and Background to a contrasting colour from your tube and draw out another same size shape.

Convert to Raster layer and position similar to the image shown below.


Merge visible. 

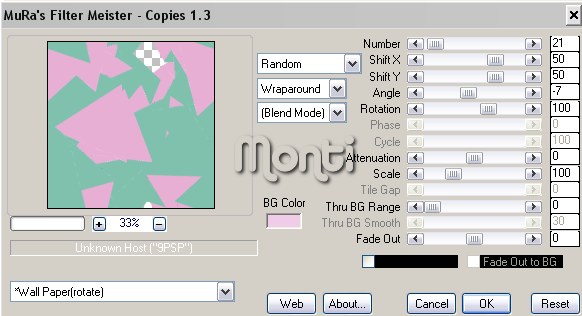
Go to Effects - Mura Meisters - Copies and use the following settings.


If you want you can apply a texture effect of your choice. I used Effects - Art Media Effects - Brush Strokes with the default settings.

Step 2: 
Copy and paste your tube as a new layer. Resize if neccessary and move to one side.
Duplicate the tube and go to Image - Mirror. 
Merge all visible and lower the Opacity to between 40 and 70 depending on what colours you used. 
If the colours are light leave your opacity higher, if the colours are dark lower the opacity more.
Activate the merged layer and go to Layers - Load/Save Mask - Load Mask from Disk. 

Select Becky-Mask22 with the following settings


Layers - Merge Group.

Copy and paste your tube as a new layer, resize if neccessary and move into position.Resize if neccessary.
Add the following Drop Shadow
Vertical: 5 
Horizontal: 5 
Opacity: 50 
Blur: 5 
Colour: Black 

Step 3: 
Select your text tool with the font of your choice. I used Childish Alpha - Size 30 - Stroke 1- Foreground Black - Background colour from your tube.
Type "Double the Trouble" and convert to Raster layer.
Change your Background to the contrasting colour we used earlier and type "Double the FUN!!"
Convert to Raster layer and Merge Down.
Go to Image - Rotate - Free Rotate - Left 20 - all layers UNchecked.
Add the following Drop Shadow
Vertical: 2 
Horizontal: 2 
Opacity: 50 
Blur: 3 
Colour: Black 

Add your name in a font and colour of your choice.
Add the same Drop Shadow we used on the other text. 
If you want to resize your tag do it now. 
Crop using Merged Opaque. 

Add the artists copyright and your watermark and save.