This tutorial was written by Monti on July 12th 2012. It's concept is copyrighted to Monti. Any creation you make from my ideas are yours. You may print out this tutorial for your own personal use, but please do not copy it in any way to put online, pass out or rewrite without my permission or worse yet attempt to claim as your own.
This was written for psp 9 but will work in other versions.
For this tutorial you will need
Paint Shop Pro
Animation shop
Tube of your Choice
I am using the art of Ismael Rac.
You can purchase a license to use his work from Xeracx Store.
Fonts of your Choice
I used BN Year 2000 font for my name.
I used Impact font for the text on the side of the tag. You will also need a small pixel font for the artist credits. I used Pixel Berry 08/84 Ltd.Edition.
Filters
Mura Meisters - Copies - Available *HERE*
L&K - Zitah - Available *HERE*
Ok we are ready to start.
REMEMBER TO SAVE OFTEN
Step 1:
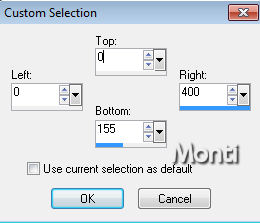
In PSP open a new 550 x 200 image with a transparent background.
Floodfill with a colour from your tube.
Go to Effects - Texture Effects - Weave with the following settings:
Gap size: 1 - Width: 7 - Opacity: 3 - Fill gaps: Checked - Weave and Gap colour: White
Copy and paste your tube as a new layer and move to one side.
Duplicate the tube and go to Image - Mirror.
In the layer palette right click on the top layer and choose Merge Down, to merge the 2 tube layers. Change the blend mode to Hard Light and lower the opacity to 50.
Rename this layer Hard Light.
Step 2:
Activate your Preset Shapes tool and choose a shape of your choice. I used a circle.
Set your Background to Null and your Foreground to White and set the line width to 3.
Draw out a small circle (see my tag as a guide for size) and go to Objects - Align - Center in Canvas.
Convert to raster layer.
Go to Adjust - Add/Remove Noise - Add Noise - Uniform: checked - Noise: 50% - Monochrome: checked.
Select your Magic Wand - Tolerance and Feather: 0 and click inside your shape.
Go to Selections - Modify - Expand by 2
Add a new raster layer and move it down to beneath the shape layer in the layer palette and fill with a colour from your tube.
Copy and paste your tube as a new layer, resize if neccessary and move into position until you have a part you want showing in the selected area. I went for her eye and fringe.
Go to Selections - Invert and press delete on the keyboard.
Go to Selections - select None.
Activate your shape layer and add the following Drop Shadow:
Vertical: 2
Horizontal: 2
Opacity: 40
Blur: 3
Colour: Black
While still on the Shape layer right click on this layer in the layer palette and choose Merge Down. Merge Down a second time so all 3 layers from your shape have become one layer.
Rename Shape.
Activate your Crop tool and crop your image using Merged Opaque to remove any excess tube outside of your canvas.
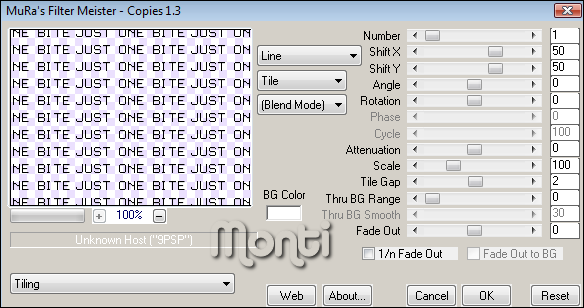
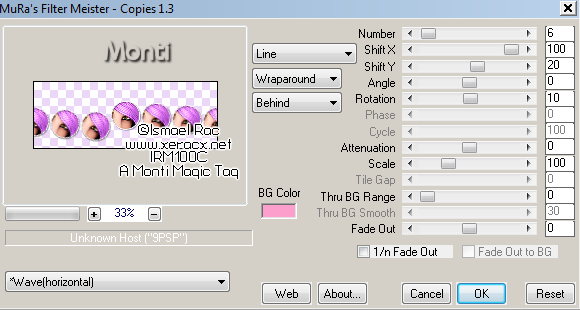
Working on the Shape layer go to Effects - Mura Meisters - Copies with the following settings.
Step 3:
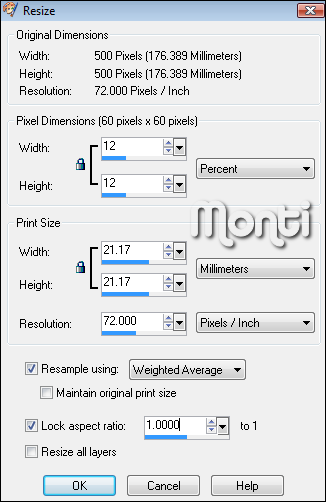
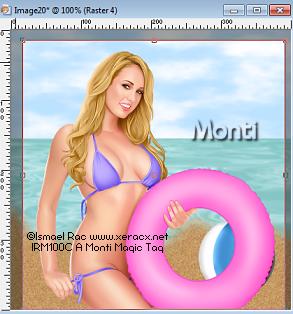
Copy and paste your tube as new layer and position in the center of the canvas. Resize if needed.
I resized mine by 70% - Weighted Average - All layers UNchecked.
After resizing go to Adjust - Sharpness - Unsharp Mask with the following settings
Radius: 1 - Strength: 15 - Clipping: 0
Add the following Drop Shadow
Vertical: 4
Horizontal: 5
Opacity: 40
Blur: 6
Colour: Black
Rename this layer Tube.
Duplicate this layer and on the duplicate go to Adjust - Blur - Gaussian Blur with a radius of 3.
Change the Blend Mode of the blurred layer to Screen.
Rename this layer Tube 1. Activate your Crop tool and crop your image using Merged Opaque to remove any excess tube outside of your canvas.
Step 4:
Add a new layer and make sure it is the top layer.
Go to Selections - Select All and flood fill with white.
Go to Selections - Modify - Contract by 5.
Press Delete on your keyboard.
Go to Selections - Select None.
Add Noise with the same settings we used earlier.
Add the following Drop Shadow.
Vertical: 2
Horizontal: 2
Opacity: 40
Blur: 2
Colour: Black
Repeat but change the Vertical and Horizontal to Minus 2.
Add a new raster layer and go to Selections - Select All and flood fill with a colour from your tube.
Go to Selections - Modify - Contract by 3.
Press Delete on your keyboard.
Go to Selections - Select None.
click on the top layer to activate it and right click in the layer palette and choose Merge Down.
Rename Frame.
Step 5:
Select your Text Tool and choose Impact font with the following settings.
Size: 72 - Stroke Width: 1 - Anti alias: Smooth - Foreground and Background: White - Create as: Vector
Type out your word using Capital letters. On the top tag I used the word "SUCK" and on the bottom tag I have used the word "LICK".
Go to Image - Rotate - Free Rotate - Left - 90 - Rotate single layer.
Position to the left of your tag and use your nodes to make it fit.
Go to Objects - Align - Vertical Center in Canvas and then convert to raster layer.
Add the following Drop Shadow:
Vertical: 2
Horizontal: 2
Opacity: 40
Blur: 3
Colour: Black
Duplicate this layer and go to Image - Flip - Image - Mirror.
In the layer palette right click on the top layer and Merge Down. Rename this layer Text.
Move this layer down beneath your Frame layer and beneath your 2 tube layers.
Change the Blend Mode to Soft Light.
Step 6:
In the Layer palette hide the following layers:
Frame - Tube 1 and Tube.
Merge all the other layers Visible.
Duplicate this merged layer twice for a total of 3 layers.
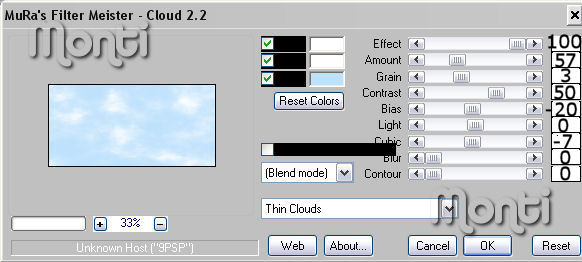
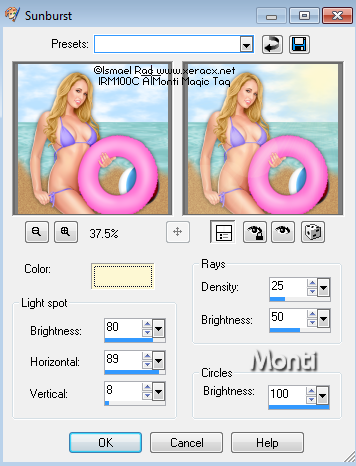
Activate the bottom layer and go to Effects and apply L en K's Zitah with the following settings
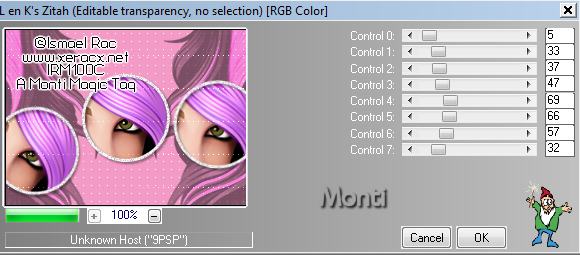
Activate the next layer up and apply L en K's Zitah again but change Control 0 to 6.
Activate the next layer up and apply L en K's Zitah again but change Control 0 to 7.
Hide the top 2 Zitah layers and unhide the Frame, Text and Tube layers.
Add the artists copyright and any license needed as a new layer. I also added a small Gradient Glow to mine. I have added the settings below for those interested.
I used Eye Candy 5 - Impact - Gradient Glow with the following settings:

Step 7:
Open Animation Shop.
In PSP go to Copy Merged and in Animation Shop to to Edit - Paste as new animation.
In PSP hide the bottom Zitah layer and unhide the middle one.
Go to Edit - Copy Merged.
In Animation Shop right click on your image and choose Paste - After current Frame.
In PSP hide the middle Zitah layer and unhide the top one.
Go to Edit - Copy Merged.
In Animation Shop right click on the 2nd frame of your image and choose Paste - After current Frame.
Still in Animation Shop go to Edit - Select All.
I usually save mine as a blank gif at this point so I can add as many names as I like at a later date.
Back in PSP select the font you want to write your name in.
Set the Background to a colour from your tube and the Foreground to Black and type your name.
Add a Drop Shadow.
Go to Edit - Copy and in Animation Shop paste as a new animation.
On your tag, make sure all 3 layers are selected and on the tool bar activate your Propagate Paste button.
Copy your name and paste into position on your tag.
Save.

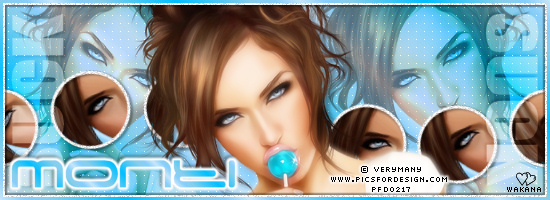
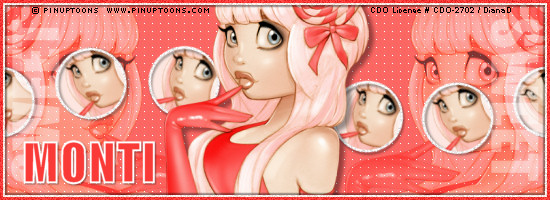
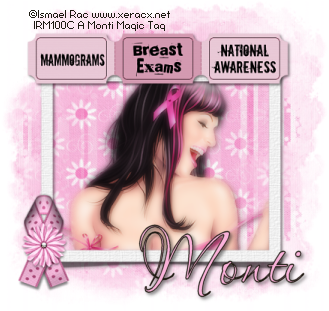
Tags Made With This Tut