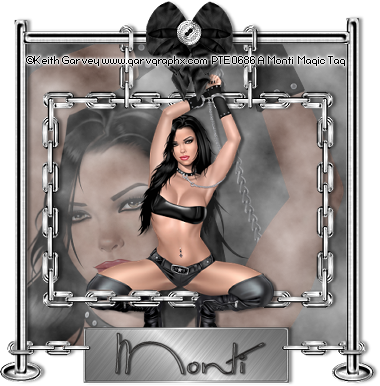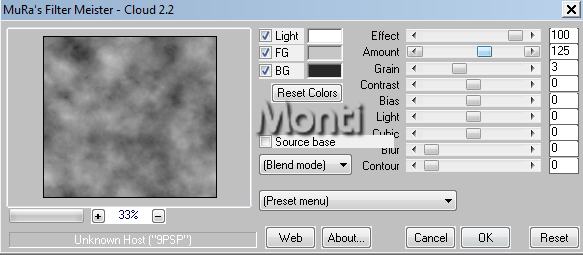

This tutorial was written by Monti on May 8th 2006 and reworked on 12th October 2014. It's concept is copyrighted to Monti. Any creation you make from my ideas are yours. You may print out this tutorial for your own personal use, but please do not copy it in any way to put online, pass out or rewrite without
my permission or worse yet attempt to claim as your own.
This was written for psp 9 but should work in other versions.
For this tutorial you will need:
Paint Shop Pro
Animation Shop
Lokas 3D Shadow (optional)
You can download it www.artistic-effects.com
Font of your choice
I used Mr Canfields which is a pay font so I am unable to supply it.
Tube or Tubes of your choice
I used tubes by ©Keith Garvey used with a license from
Please only use an artist you have permission for.
My Supplies
Includes my Camera and Filmstrip tubes. These were both made by me, please do not share them or use them in a tut without asking permission and giving me a link back.
Download Here
Mask Of your choice
I used gemsmasks-114 available at http://gemstagginscraps.blogspot.co.uk/search/label/Masks
Ok we are ready to start.
REMEMBER TO SAVE OFTEN
Step 1:
Open a new image 500x500 pixels.
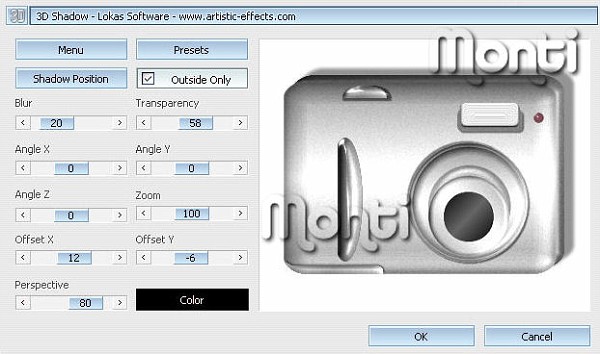
Copy and paste the camera as a new layer. Add a drop shadow of your choice.
I used Lokas 3D shadow with the following settings.
Duplicate this layer. Make sure the duplicate is active and set your Selection Tool to Circle - Tolerance and Feather: 0.
Put your cursor in the middle of the shutter and hold down your shift key. Pull your mouse out to make a circle slightly smaller than the shutter size.
Go to Adjust - Brightness/Contrast - Brightness: 115 - Contrast: -17
Deselect.
Change your Selection Tool to Rounded Rectangle and select the flash on the camera.
Go to Adjust - Brightness/Contrast - Brightness: 35 Contrast = -17
Deselect.
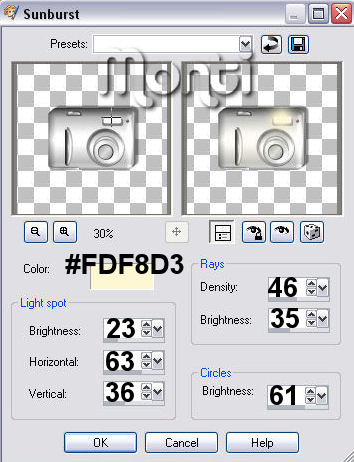
Go to Effects - Illumination Effects - Sunburst.
Use the settings shown below
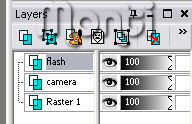
Rename your layers as shown below.
Step 2:
Copy and paste your tube as a new layer, resize as neccessary.
DO Not close the original if you are only using 1 tube.
Position the tube where you think it looks best - see my image as a guide and add a Drop Shadow of your choice.
Rename this layer Tube.
Copy and paste your Film Strip tube as a new layer.
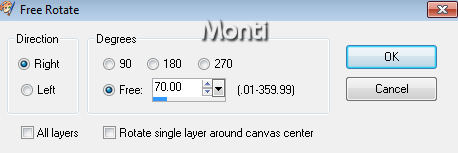
Go to Image - Rotate - Free Rotate with the settings shown below
Rename this layer Film and move it to cover the bottom of your tube. See my tag as a guide.
Duplicate.
Step 3:
Click on the duplicate layer to activate it and select your Magic Wand - Tolerance and Feather: 0.
Click inside one section of the top frame to select it. Go to Selections - Modify - Expand by 3.
Copy and paste your tube as a new layer, move beneath the duplicate frame layer.
Arrange so that the part of the tube you want inside the frame is visible in the selection.
Go to Selections - Invert - press Delete on the keyboard.
Click on the top Film Strip layer and Merge Down. Duplicate this layer.
Repeat from Step 3 until all 3 frames are filled.
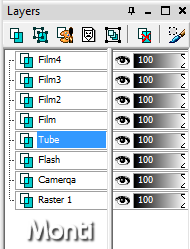
Rename Film 2, Film 3 and Film 4 as shown below and add a drop shadow of your choice to each film layer.
Step 4:
Add a new raster layer and move to the bottom of the layer palette.
Flood Fill with a colour from your choice.
Apply a mask of your choice and Merge Group.
Resize mask layer if needed.
Go to Crop - Merged Opaque and crop your image.
If you want to resize your image do so now. I resized mine by 85%.
Step 5:
Add the artists copyright as a new raster layer.
Set your Foreground colour to #808080 and your Background colour to white.
Set your Background to the Background/Foreground gradient.
Click on the text tool making sure Vector is selected and using a font of your choice add your name.
Once you are happy with the size and placing convert to Raster layer and add a Drop Shadow of your choice. I used
Vertical: 2
Horizontal: 2
Opacity: 60
Blur: 2
Colour: Black
Step 6: *Animation*
If you are going to animate, add a new raster layer and flood fill with white. Move to the bottom of the layer palette.
Open Animation Shop.
Back in PSP hide Film 2, Film 3, Film 4 and flash layer.
Edit/ Copy Merged and paste as a new image in animation shop.
Back in PSP hide Camera layer and unhide Flash.
Copy merged and paste after current frame in animation shop.
In PSP hide Flash and unhide Camera. Hide Film and unhide Film 2.
Copy merged and paste after current frame in animation shop.
In PSP hide Camera, unhide Flash.
Copy merged and paste after current frame in animation shop.
In PSP hide Flash, unhide Camera. Hide Film 2 and unhide Film 3.
Copy merged and paste after current frame in animation shop.
In PSP hide Camera, unhide Flash. Copy merged and paste after current frame in animation shop.
In PSP unhide Camera, hide Flash. Hide Film 3 and unhide Film 4.
Copy merged and paste after current frame in animation shop.
In animation shop go to Edit - Select all.
Go to Animation - Frame Properties and set it to 50.
Click on the very last frame - frame 7 - to activate it and right click and change the properties for that frame only to 100.
Save as gif.