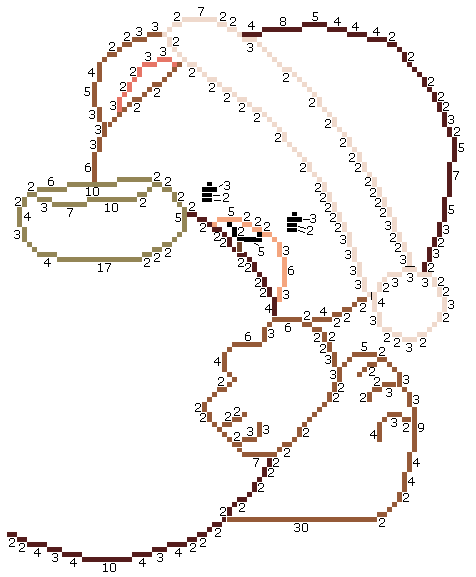
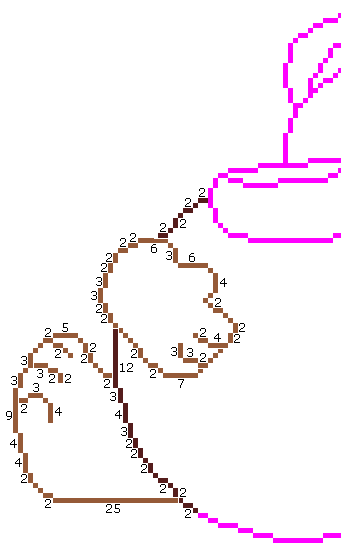
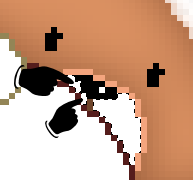
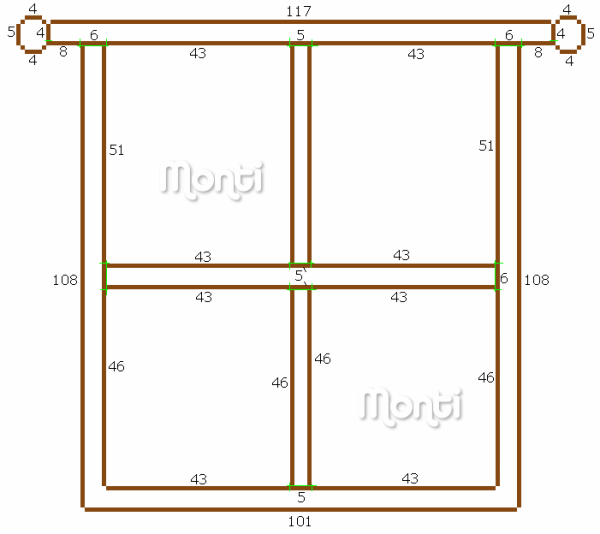
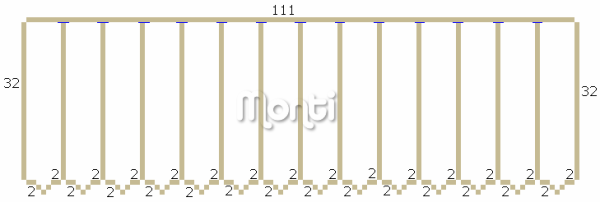
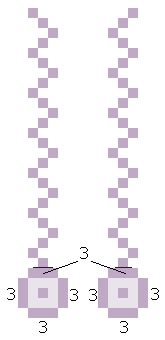
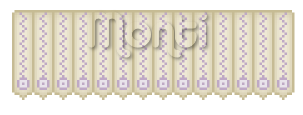
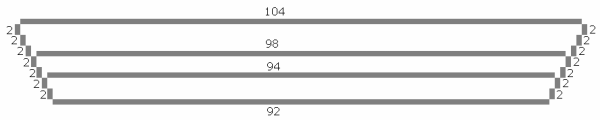
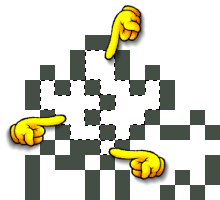
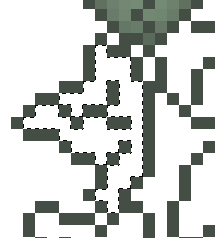
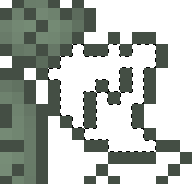
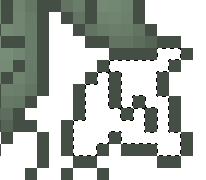
When your outline is complete, select your magic wand with the same settings we used earlier and click inside the top segment.
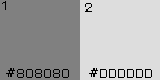
Select colour 2 (#DDDDDD) on your Colour Chart and flood fill this selection.
Shadow colour: Use your window box outline (#808080).
Deselect.
Select colour 2 (#DDDDDD) on your Colour Chart and flood fill this selection.
Shadow colour: Use your window box outline (#808080).
Deselect.
Select colour 2 (#DDDDDD) on your Colour Chart and flood fill this selection.
Shadow colour: Use your window box outline (#808080).
Deselect.
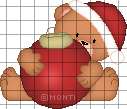
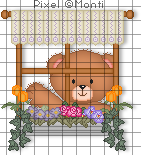
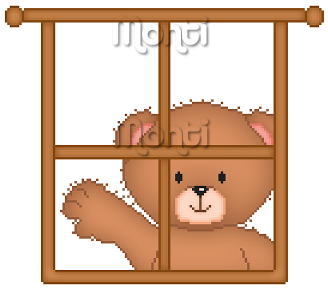
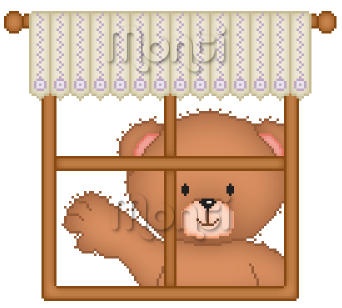
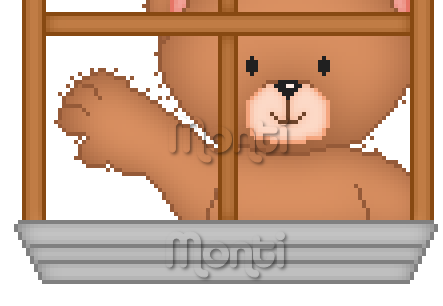
Unhide the frame, bear and blind layers and use your move tool to move your window box into position as shown below.
Save this as a PSP file so you can open it later to add the flowers to it.
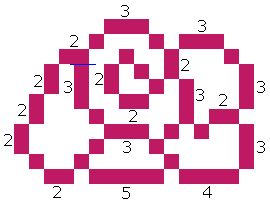
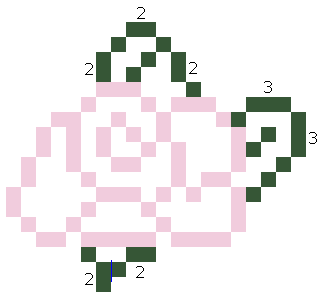
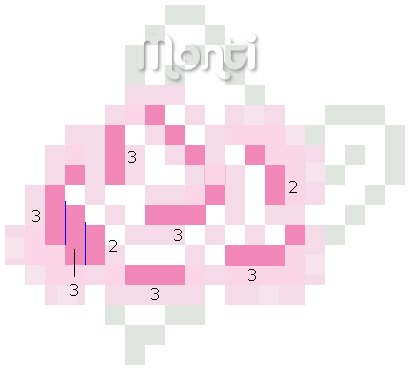
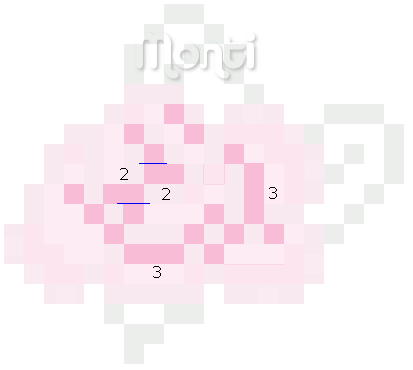
When the Rose outline is complete change your foreground to colour 2 on the colour chart (#365636) and draw in the leaves outline shown below.
Change your foreground to colour 4 (#F187B6) on your Colour Chart and draw in the areas shown below.
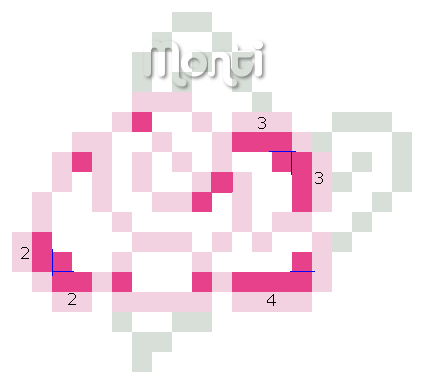
Change your foreground to colour 5 (#F8BCD7) on your Colour Chart and draw in the areas shown below.
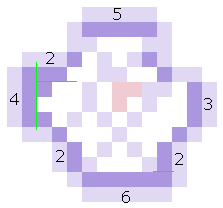
Step 12: Tulip Outline
Open a new image 200 x 200 transparent.
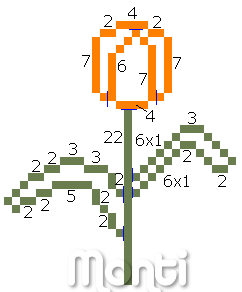
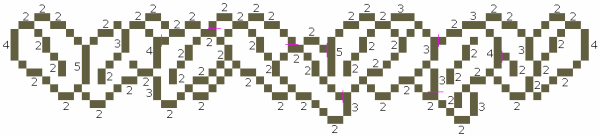
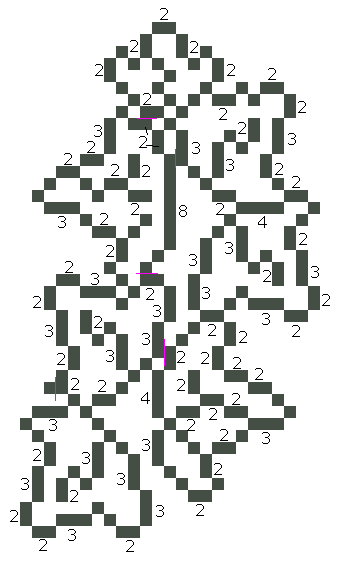
Select the brush tool with the same settings we used earlier and draw in the outline shown below.
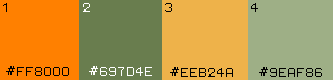
Set your foreground to colour 1 on the colour chart (#FF8000) and start at the top of your canvas, changing to colour 2 (#697D4E) when you get to the stem and leaves.
To make this easier I have numbered all pixels over 1.
Step 13: Tulip Fills
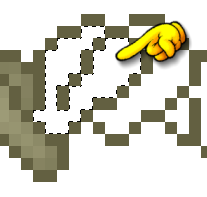
Select your magic wand with the same settings we used earlier and click inside the left part of the tulip.
Select colour 3 (#EEB24A) on your Colour Chart and flood fill this selection.
Keep selected.
Selections float, Effects 3D effects, Cutout with the following settings
Vertical: 0
Horizontal: 0
Opacity: 100
Blur: 2
Shadow colour: Use your tulip outline (#FF8000).
Make sure fill interior with colour is UNchecked.
Deselect.
______________________________________
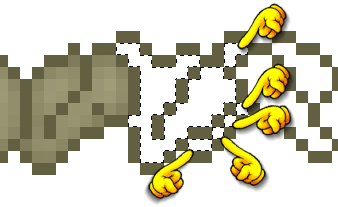
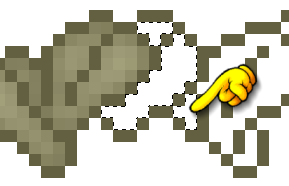
Select your magic wand with the same settings we used earlier and click inside the right part of the tulip making sure you select the stray pixel shown below.
Select colour 3 (#EEB24A) on your Colour Chart and flood fill this selection.
Keep selected.
Selections float, Effects 3D effects, Cutout with the following settings
Vertical: 0
Horizontal: 0
Opacity: 100
Blur: 2
Shadow colour: Use your tulip outline (#FF8000).
Make sure fill interior with colour is UNchecked.
Deselect.
______________________________________
Select your magic wand with the same settings we used earlier and click inside the center part of the tulip.
Select colour 3 (#EEB24A) on your Colour Chart and flood fill this selection.
Keep selected.
Selections float, Effects 3D effects, Cutout with the following settings
Vertical: 0
Horizontal: 0
Opacity: 100
Blur: 3
Shadow colour: Use your tulip outline (#FF8000).
Make sure fill interior with colour is UNchecked.
Deselect.
______________________________________
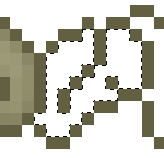
Select your magic wand with the same settings we used earlier and click inside the left leaf making sure you select the stray pixel shown below.
Select colour 4 (#9EAF86) on your Colour Chart and flood fill this selection.
Keep selected.
Selections float, Effects 3D effects, Cutout with the following settings
Vertical: 0
Horizontal: 0
Opacity: 100
Blur: 3
Shadow colour: Use your leaf outline (#697D4E).
Make sure fill interior with colour is UNchecked.
Deselect.
______________________________________
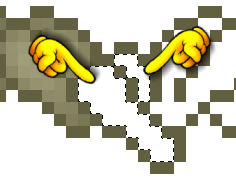
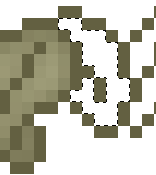
Select your magic wand with the same settings we used earlier and click inside the right leaf making sure you select ALL the pixels in the leaf.
Select colour 4 (#9EAF86) on your Colour Chart and flood fill this selection.
Keep selected.
Selections float, Effects 3D effects, Cutout with the following settings
Vertical: 0
Horizontal: 0
Opacity: 100
Blur: 3
Shadow colour: Use your leaf outline (#697D4E).
Make sure fill interior with colour is UNchecked.
Deselect.
Save the rose as a psp file so we can add it to the window box after we finish the other flowers.
______________________________________
Flowers - Pansies
You will need the following Colour Chart
Save and then open in PSP
Of course you are free to use any colours you want.
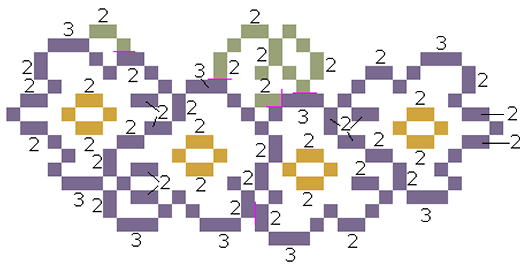
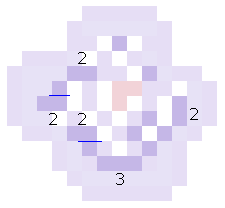
Step 14: Pansies Outline
Open a new image 200 x 200 transparent.
Select the brush tool with the same settings we used earlier and draw in the outline shown below.
Set your foreground to colour 1 on the colour chart (#7A6A90) and start drawing your pansies, changing to colour 2 (#98A177) when you get to the leaves and change to colour 3 (#D1A53D) for the flower centers.
To make this easier I have numbered all pixels over 1.
Step 15: Pansy Fills
Select your magic wand with the same settings we used earlier and click inside the left pansy.
Select colour 4 (#C5BDD1) on your Colour Chart and flood fill this selection.
Keep selected.
Selections float, Effects 3D effects, Cutout with the following settings
Vertical: 0
Horizontal: 0
Opacity: 100
Blur: 3
Shadow colour: Use your pansy outline (#7A6A90).
Make sure fill interior with colour is UNchecked.
Deselect.
______________________________________
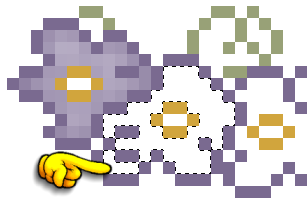
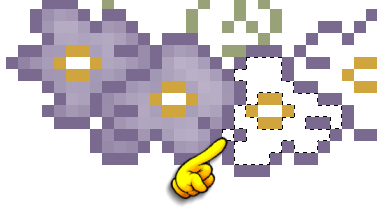
Select your magic wand with the same settings we used earlier and click inside the next pansy along making sure you select the stray pixels shown below.
Select colour 4 (#C5BDD1) on your Colour Chart and flood fill this selection.
Keep selected.
Selections float, Effects 3D effects, Cutout with the following settings
Vertical: 0
Horizontal: 0
Opacity: 100
Blur: 3
Shadow colour: Use your pansy outline (#7A6A90).
Make sure fill interior with colour is UNchecked.
Deselect.
______________________________________
Select your magic wand with the same settings we used earlier and click inside the next pansy along making sure you select the stray pixels shown below.
Select colour 4 (#C5BDD1) on your Colour Chart and flood fill this selection.
Keep selected.
Selections float, Effects 3D effects, Cutout with the following settings
Vertical: 0
Horizontal: 0
Opacity: 100
Blur: 3
Shadow colour: Use your pansy outline (#7A6A90).
Make sure fill interior with colour is UNchecked.
Deselect.
______________________________________
Select your magic wand with the same settings we used earlier and click inside the right pansy.
Select colour 4 (#C5BDD1) on your Colour Chart and flood fill this selection.
Keep selected.
Selections float, Effects 3D effects, Cutout with the following settings
Vertical: 0
Horizontal: 0
Opacity: 100
Blur: 3
Shadow colour: Use your pansy outline (#7A6A90).
Make sure fill interior with colour is UNchecked.
Deselect.
______________________________________
Select your magic wand with the same settings we used earlier and click inside the left pansy center.
Select colour 5 (#E9D379) on your Colour Chart and flood fill this selection.
Keep selected.
Selections float, Effects 3D effects, Cutout with the following settings
Vertical: 0
Horizontal: 0
Opacity: 100
Blur: 2
Shadow colour: Use your pansy center outline (#D1A53D).
Make sure fill interior with colour is UNchecked.
Deselect.
Repeat for the other pansy centers.
______________________________________
Select your magic wand with the same settings we used earlier and click inside ALL the leaf areas making sure you select the stray pixel shown below.
Select colour 6 (#C1C7AB) on your Colour Chart and flood fill this selection.
Keep selected.
Selections float, Effects 3D effects, Cutout with the following settings
Vertical: 0
Horizontal: 0
Opacity: 100
Blur: 3
Shadow colour: Use your leaf outline (#98A177).
Make sure fill interior with colour is UNchecked.
Deselect.
Save the pansies as a psp file so we can add it to the window box after we finish the other flowers.
______________________________________
Flowers - Single Flower
You will need the following Colour Chart
Save and then open in PSP
Of course you are free to use any colours you want.
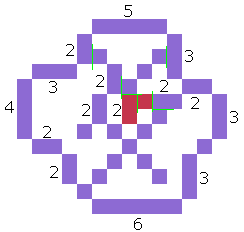
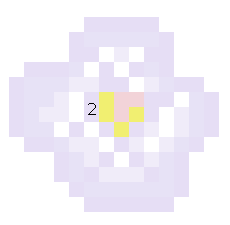
Step 16: Single Flower Outline
Open a new image 200 x 200 transparent.
Select the brush tool with the same settings we used earlier and draw in the outline shown below.
Set your foreground to colour 1 on the colour chart (#8D6AD3) and start drawing your flower, changing to colour 6 (#C5354D) when you get to the flower center.
To make this easier I have numbered all pixels over 1.
Step 17: Single Flower Fills
When your outline is complete, change your foreground to colour 2 (#AA97DF) on your Colour Chart and draw in the areas shown below.
Change your foreground to colour 3 (#C5B7E7) on your Colour Chart and draw in the areas shown below.
Change your foreground to colour 5 (#F1EF71) on your Colour Chart and draw in the areas shown below.
Change your foreground to colour 4 (#DED7F3) on your Colour Chart and draw in the blank areas to complete your flower, so it looks like the one below.
Save the flower as a psp file so we can add it to the window box after we finish the other flowers.
______________________________________
Leaves
You will need the following Colour Chart.
Save and then open in PSP
Of course you are free to use any colours you want.
Step 18: Leaves Outline
Open a new image 200 x 200 transparent.
Select the brush tool with the same settings we used earlier and draw in the outline shown below.
Set your foreground to colour 1 on the colour chart (#636041) and start drawing your leaves.
To make this easier I have numbered all pixels over 1.
Step 19: Leaf Fills
Select your magic wand with the same settings we used earlier and click inside the left leaf as shown below.
Select colour 2 (#A8A681) on your Colour Chart and flood fill this selection.
Keep selected.
Selections float, Effects 3D effects, Cutout with the following settings
Vertical: 0
Horizontal: 0
Opacity: 100
Blur: 3
Shadow colour: Use your leaf outline (#636041).
Make sure fill interior with colour is UNchecked.
Deselect.
______________________________________
Select your magic wand with the same settings we used earlier and click inside the 2nd leaf as shown below.
Select colour 2 (#A8A681) on your Colour Chart and flood fill this selection.
Keep selected.
Selections float, Effects 3D effects, Cutout with the following settings
Vertical: 0
Horizontal: 0
Opacity: 100
Blur: 3
Shadow colour: Use your leaf outline (#636041).
Make sure fill interior with colour is UNchecked.
Deselect.
______________________________________
Select your magic wand with the same settings we used earlier and click inside the 3rd leaf making sure you select all the stray pixels as shown below.
Select colour 2 (#A8A681) on your Colour Chart and flood fill this selection.
Keep selected.
Selections float, Effects 3D effects, Cutout with the following settings
Vertical: 0
Horizontal: 0
Opacity: 100
Blur: 3
Shadow colour: Use your leaf outline (#636041).
Make sure fill interior with colour is UNchecked.
Deselect.
______________________________________
Select your magic wand with the same settings we used earlier and click inside the 4th leaf making sure you select both sides as shown below.
Select colour 2 (#A8A681) on your Colour Chart and flood fill this selection.
Keep selected.
Selections float, Effects 3D effects, Cutout with the following settings
Vertical: 0
Horizontal: 0
Opacity: 100
Blur: 3
Shadow colour: Use your leaf outline (#636041).
Make sure fill interior with colour is UNchecked.
Deselect.
______________________________________
Select your magic wand with the same settings we used earlier and click inside the 5th leaf making sure you select both sides as shown below.
Select colour 2 (#A8A681) on your Colour Chart and flood fill this selection.
Keep selected.
Selections float, Effects 3D effects, Cutout with the following settings
Vertical: 0
Horizontal: 0
Opacity: 100
Blur: 3
Shadow colour: Use your leaf outline (#636041).
Make sure fill interior with colour is UNchecked.
Deselect.
______________________________________
Select your magic wand with the same settings we used earlier and click inside the 6th leaf as shown below.
Select colour 2 (#A8A681) on your Colour Chart and flood fill this selection.
Keep selected.
Selections float, Effects 3D effects, Cutout with the following settings
Vertical: 0
Horizontal: 0
Opacity: 100
Blur: 3
Shadow colour: Use your leaf outline (#636041).
Make sure fill interior with colour is UNchecked.
Deselect.
______________________________________
Select your magic wand with the same settings we used earlier and click inside the 7th leaf making sure you also select the part underneath as shown below.
Select colour 2 (#A8A681) on your Colour Chart and flood fill this selection.
Keep selected.
Selections float, Effects 3D effects, Cutout with the following settings
Vertical: 0
Horizontal: 0
Opacity: 100
Blur: 3
Shadow colour: Use your leaf outline (#636041).
Make sure fill interior with colour is UNchecked.
Deselect.
______________________________________
Select your magic wand with the same settings we used earlier and click inside the 8th leaf making sure you also select the part underneath as shown below.
Select colour 2 (#A8A681) on your Colour Chart and flood fill this selection.
Keep selected.
Selections float, Effects 3D effects, Cutout with the following settings
Vertical: 0
Horizontal: 0
Opacity: 100
Blur: 3
Shadow colour: Use your leaf outline (#636041).
Make sure fill interior with colour is UNchecked.
Deselect.
______________________________________
Select your magic wand with the same settings we used earlier and click inside the 9th leaf as shown below.
Select colour 2 (#A8A681) on your Colour Chart and flood fill this selection.
Keep selected.
Selections float, Effects 3D effects, Cutout with the following settings
Vertical: 0
Horizontal: 0
Opacity: 100
Blur: 3
Shadow colour: Use your leaf outline (#636041).
Make sure fill interior with colour is UNchecked.
Deselect.
______________________________________
Select your magic wand with the same settings we used earlier and click inside the 10th and last leaf ,making sure you select both parts as shown below.
Select colour 2 (#A8A681) on your Colour Chart and flood fill this selection.
Keep selected.
Selections float, Effects 3D effects, Cutout with the following settings
Vertical: 0
Horizontal: 0
Opacity: 100
Blur: 3
Shadow colour: Use your leaf outline (#636041).
Make sure fill interior with colour is UNchecked.
Deselect.
Save the leaves as a psp file so we can add it to the window box after we finish the vines.
______________________________________
Vines
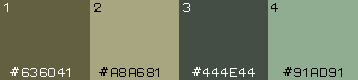
You will need the same colour chart we used for the leaves above.
Step 20: Vine Outline
Open a new image 200 x 200 transparent.
Select the brush tool with the same settings we used earlier and draw in the outline shown below.
Set your foreground to colour 3 on the colour chart (#444E44) and start drawing your vine leaves.
To make this easier I have numbered all pixels over 1.
Step 21: Vine Fills
Select your magic wand with the same settings we used earlier and click inside the top leaf making sure you select all 3 sections as shown below.
Select colour 4 (#91AD91) on your Colour Chart and flood fill this selection.
Keep selected.
Selections float, Effects 3D effects, Cutout with the following settings
Vertical: 0
Horizontal: 0
Opacity: 100
Blur: 4
Shadow colour: Use your vine outline (#444E44).
Make sure fill interior with colour is UNchecked.
Deselect.
______________________________________
Select your magic wand with the same settings we used earlier and click inside the top left leaf as shown below.
Select colour 4 (#91AD91) on your Colour Chart and flood fill this selection.
Keep selected.
Selections float, Effects 3D effects, Cutout with the following settings
Vertical: 0
Horizontal: 0
Opacity: 100
Blur: 5
Shadow colour: Use your vine outline (#444E44).
Make sure fill interior with colour is UNchecked.
Deselect.
______________________________________
Select your magic wand with the same settings we used earlier and click inside the top right leaf as shown below.
Select colour 4 (#91AD91) on your Colour Chart and flood fill this selection.
Keep selected.
Selections float, Effects 3D effects, Cutout with the following settings
Vertical: 0
Horizontal: 0
Opacity: 100
Blur: 6
Shadow colour: Use your vine outline (#444E44).
Make sure fill interior with colour is UNchecked.
Deselect.
______________________________________
Select your magic wand with the same settings we used earlier and click inside the middle right leaf as shown below.
Select colour 4 (#91AD91) on your Colour Chart and flood fill this selection.
Keep selected.
Selections float, Effects 3D effects, Cutout with the following settings
Vertical: 0
Horizontal: 0
Opacity: 100
Blur: 6
Shadow colour: Use your vine outline (#444E44).
Make sure fill interior with colour is UNchecked.
Deselect.
______________________________________
Select your magic wand with the same settings we used earlier and click inside the middle left leaf as shown below.
Select colour 4 (#91AD91) on your Colour Chart and flood fill this selection.
Keep selected.
Selections float, Effects 3D effects, Cutout with the following settings
Vertical: 0
Horizontal: 0
Opacity: 100
Blur: 5
Shadow colour: Use your vine outline (#444E44).
Make sure fill interior with colour is UNchecked.
Deselect.
______________________________________
Select your magic wand with the same settings we used earlier and click inside the right bottom leaf making sure you select all 3 sections as shown below.
Select colour 4 (#91AD91) on your Colour Chart and flood fill this selection.
Keep selected.
Selections float, Effects 3D effects, Cutout with the following settings
Vertical: 0
Horizontal: 0
Opacity: 100
Blur: 5
Shadow colour: Use your vine outline (#444E44).
Make sure fill interior with colour is UNchecked.
Deselect.
______________________________________
Select your magic wand with the same settings we used earlier and click inside the bottom left leaf as shown below.
Select colour 4 (#91AD91) on your Colour Chart and flood fill this selection.
Keep selected.
Selections float, Effects 3D effects, Cutout with the following settings
Vertical: 0
Horizontal: 0
Opacity: 100
Blur: 5
Shadow colour: Use your vine outline (#444E44).
Make sure fill interior with colour is UNchecked.
Deselect.
Save the vines as a psp file so we can add it to the window box with all the flowers.
______________________________________
Finish
Open your window bear PSP file and all your flowers and leaves in PSP.
Copy and paste the flowers and leaves onto your canvas as new layers.
Use my tag to help you position them.
Feel free to move them around and mirror some leaves and flowers to give you the desired effect.