This tutorial was written by Monti on May 11th 2008. It's concept is copyrighted to Monti. Any creation you make from my ideas are yours. You may print out this tutorial for your own personal use, but please do not copy it in any way to put online, pass out or rewrite without my permission or worse yet attempt to claim as your own.
This was written for psp 9 but will work in other versions.
For this tutorial you will need
Paint Shop Pro
Mask of your Choice
I used Vix_Mask42 - Thank you Vix.
You can download it and many others at Vix PSP.
Scroll down for the set with this mask in. Unzip and open Vix_Mask42 in PSP.
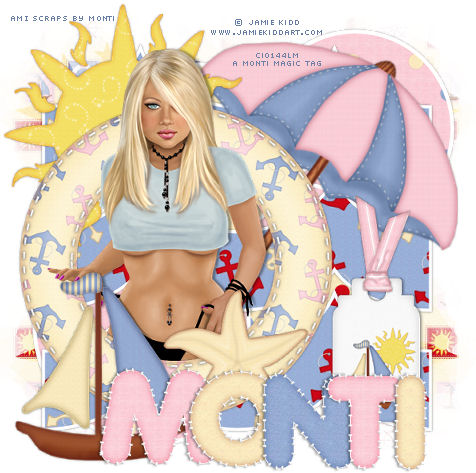
A Tube of your Choice
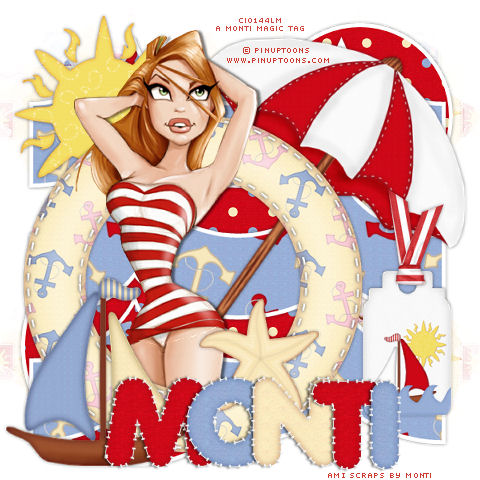
I am using the wonderful art of PinUpToons used with a license from CILM.
You can purchase a license to use his work from CDO.
My Summer Beach Scrap Kit
You can purchase this kit from Taggers Delight
My Wave Preset Shape
Download Here
Place in your PSP shapes folder. Alternatively open in psp and go to file export to shape.
Ok we are ready to start.
REMEMBER TO SAVE OFTEN
Step 1:
Open a new transparent image 600 x 600 pixels.
Copy and paste one of the papers as a new layer (I used Patchwork Paper) onto the canvas and resize by 85% Bicubic Selected - All Layers unchecked.
Go to Layers - New Mask layer -From Image and in the drop down box find Vix_Mask42.
Make sure Source Luminance is checked and click ok.
In the layer palette right click on the top layer and choose Merge Group.
Dupliate this layer and still in the layer palette click on the top layer and choose Merge Down.
Rename this layer Mask.
Step 2:
Open another paper of choice and minimize.
Select your Preset Shapes with the following settings.
Line width: 5 - Antialias Checked - Line Style: Solid and select Circle.
Set your foreground to white and your background to Pattern. Find the paper and set the Scale to 80.
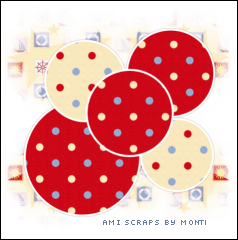
Draw out a circle. When happy with the size convert to raster and add a drop shadow. I used
Vertical: 0
Horizontal: 0
Opacity: 45
Blur: 5
Colour: Black
Create at least 2 more circles of varying sizes and arrange on your canvas - converting each to raster layer and adding a drop shadow as you go - see screen shot below.
If you want you can change your background to another paper so they vary.
Hide your masks layers and merge visible.
Rename this layer to Shapes and unhide all layers.
Step 3:
Change your background to one of the blue papers, I used Blue Anchor, leave the foreground on white still on Line Width: 5 and set your Preset Shpaes to Monti -Waves.
Draw out a large wave shape to fill your canvas.
Go to Object - Align - Center in Canvas and convert to raster layer.
Add the same drop shadow we used above and rename this layer Waves .
Step 4:
Copy and paste one of the frames as a new layer onto your canvas. Rename this layer Frame.
Resize by 60% Smart Size - All Layers UNChecked and move to the left side of your canvas.
Now open your tube and copy and paste as a new layer. Move under your frame layer and move into position, resize if neccesary.
Duplicate the tube layer and move the layer above the frame layer.
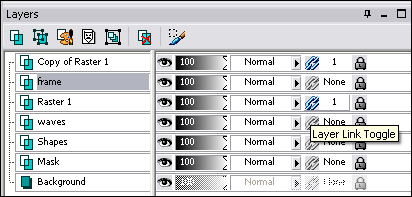
In the layer palette click on the Layer Toggle Link on your tube layer and copy of tube layer to change them to 1 to link them together.
See screen shot below.
This way if you have to move your tube, both with move together.
Activate your top tube layer and with your Eraser brush, erase the parts at the bottom that go over the frame and any that stick out underneath the frame.
Activate the bottom tube and erase any area of tube that sticks out underneath the frame.
Activate the frame layer and add the same drop shadow we used above.
Activate the bottom tube layer and add a drop shadow of choice. I used
Vertical: 0
Horizontal: 5
Opacity: 45
Blur: 4
Colour: Black
Step 5:
Copy and paste one of the parasols as a new layer and resize by 60% Smart Size - All Layers UNChecked.
Move to the right and move the layer beneath the bottom tube layer.
Add a drop shadow. I used
Vertical: 0
Horizontal: 0
Opacity: 45
Blur: 5
Colour: Black
Copy and paste the sun as a new layer and resize by 60% Smart Size - All Layers UNChecked.
Move to the top left and move the layer beneath the bottom tube layer.
Add the same drop shadow we used above.
Step 6:
Click on the top layer to activate it and copy and paste a Tag of your choice as a new layer.
Resize by 45% Smart Size - All Layers UNChecked and move to the right under the parasol.
Add the same drop shadow we used above.
Copy and paste the Tag Ribbon, resize the same, move into position at the top of the tag and add the same drop shadow.
Add any other elements of choice resizing as neccessatry and position on the canvas - I added a Starfish and Boat - add dropshadows.
Step 7:
I added my name using the alphas in different colours.
I resized each one by 40% Smart Size - All Layers UNChecked and added the following drop shadow to each letter
Vertical: -2
Horizontal: 5
Opacity: 45
Blur: 4
Colour: Black
Crop to size using Merged Opaque.
I resized mine by 80% Bicubic - ALL layers Checked.
Add all your artist credits and your watermark.
Save your tag.


No comments:
Post a Comment