


This tutorial was written by Monti on June 29th 2009. It's concept is copyrighted to Monti. Any creation you make from my ideas are yours. You may print out this tutorial for your own personal use, but please do not copy it in any way to put online, pass out or rewrite without my permission or worse yet attempt to claim as your own.
This was written for psp 9 but will work in other versions.
For this tutorial you will need
Paint Shop Pro
Xero - Artworx
Available *HERE* Scroll down
Mura's Meister - Copies
Available *HERE*
Eye Candy 4000 - Gradient Glow
Optional.
A Mask Of Your Choice
I used Vix_Mask147 by Vix at Vix PSP.
It is about halfway down the page in the set titled 10th May 2008 - Vix_Masks 141-180.
Unzip and put into your PSP Mask folder.
Font Of Your Choice
I used Bring Tha Noize.
A Tube of your Choice
I used a tube by Ismael Rac with a license from AMI. You can purchase a license to use his work from Xeracx Store.
Ok we are ready to start.
REMEMBER TO SAVE OFTEN
Step 1:
Open a new image 600 x 600 pixels.
We need the Rulers on for the first part so on the top tool bar click on View and then on Rulers in the drop down box.
You should now see numbers along the top and left side.
Activate your Preset Shapes Tool set to Star.
Set your Foreground to Black and your Background to Null and your Line Width to 10.
Move your cursor to the place where 100 pixels across and 100 pixels down meet and click on the canvas.
Drag out your cursor until the bottom right corner of PSP says 570 x 570 pixels - see below:
Then go to Objects - Align Center in Canvas and convert to Raster layer.
Click inside with your Magic Wand and go to Selections - Modify - Expand by 5.
Add a new Raster layer and move it beneath the Star layer.
Set your Foreground to a light colour from your tube and the Background to a dark colour from your tube.
Change your Foreground to Gradient - Foreground/Background - set to Sunburst and change the Repeats to 4.
Flood fill the new layer and then Deselect.
Go to Effects - Xero - Artworx and apply with the following settings:

Activate your black Star layer and add the following Drop Shadow:
Vertical: 2
Horizontal: 2
Opacity: 57
Blur: 3
Colour: Black
Add a new Raster layer and move it to just above your white Background.
Fill with the same gradient we used for the star fill.
Go to Effects - Xero - Artworx but this time change the brush setting to Fine Lines.
Go to Layers - Load/Save Mask - Load Mask from Disk and find Vix_mask147, then click OK/Load.
In the layer palette right click on the layer called Group - Raster 1 and choose Merge Group.
Step 2:
Activate your Black Star layer again and click inside it with your Magic Wand.
Go to Selections - Modify - Expand by 8
Copy and paste your tube as a new layer and move it beneath your Star outline layer.
The tube I used came with a Close Up so I used the close up for this part.
Move it so the part you want showing is in the selections and then go to Selections - Invert and press Delete on your keyboard.
Deselect and add a Drop Shadow to your tube. I used:
Vertical: 0
Horizontal: 5
Opacity: 50
Blur: 7
Colour: Black
Duplicate the tube layer.
Making sure you are on the duplicate go to Adjust - Blur - Gaussian Blur - Radius: 3 and then change the blur layer properties to Overlay.
Step 3:
Hide the white Background layer and the Mask layer and go to Edit - Copy Merged.
Unhide All layers by going to Layers - View - All.
Go to Edit - Paste - Paste as New Layer.
Go to Image - Resize - 25% - Smart Size selected - All Layers UNchecked.
Then go to Effects - Mura's Meister - Copies and choose the Spiral preset with the default settings as shown below:

On your keyboard press CTRL and X - don't worry when the layer disappears - and then go to Edit - Paste As New Layer. This will make sure the spiral is centered.
Add a large blurry Drop Shadow. I used the same one I used on my tube.
Step 4:
Go to Image - Resize - ALL layers Checked - 85% - Bicubic selected.
Go to Image - Canvas Size - 600 x 600 pixels - Center Placement Checked.
Make sure the bottom layer is still filled with white.
Add another tube as a New Layer and resize to fit your tag.
Add a Drop Shadow of your choice.
Duplicate the tube layer and go to Adjust - Blur - Gaussian Blur - Radius: 3 and then change the blur layer properties to Overlay again.
Add your name using a font of your choice. I used Bring Tha Noize with the Foreground set to Black and the Background set to a colour from my tube. Go to Objects - Align - Horizontal Center in Canvas and convert to raster layer.
Add an Eye Candy 4000 Gradient Glow with the following settings:
Under Basic set the Glow Width to 3 - Soft Corners set to 25 - Opacity to 100.
Under Colour choose Fat and then change the first colour to Black and the 2nd colour to a light colour from a tube.
Add a Drop Shadow of your choice.
If you are going to resize your image do it now.
Once you have resized add the artists copyright and your watermark.
Hide the white background layer and select your Crop Tool.
In the top Tool Bar choose the Merged Opaque option - see below:
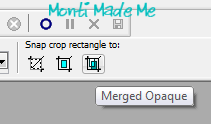
Then double click the center of the image OR select the tick on the left of the top toolbar.
Save the finished tag.
I hope you enjoyed this tutorial.
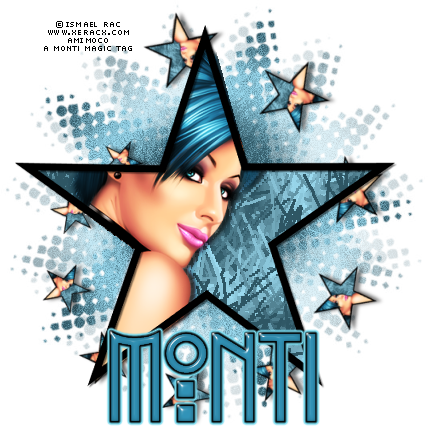
Tags Made With This Tut

No comments:
Post a Comment