

This tutorial was written by Monti on January 7th 2007 and reworked on 18th October 2014. It's concept is copyrighted to Monti. Any creation you make from my ideas are yours. You may print out this tutorial for your own personal use, but please do not copy it in any way to put online, pass out or rewrite without my permission or worse yet attempt to claim as your own.
This was written for psp 9 but will work in other versions.
For this tutorial you will need
Paint Shop Pro
Animation Shop
Toadies
Plain Mosaic Blur - available HERE.
Fonts of your choice
I used Do I Like Stripes.
Supplies
This includes my Mummy Case tube and my mask. Open the Mummy case in PSP and save the mask in your mask folder.
NOTE: This tube was drawn by me for the sole purpose of this tutorial. DO NOT share or use in another tut without my express permission.
A tube of your choice
I am using the wonderful art of Joel Adams used with a license from CILM.
You can purchase a license to use his work from CDO.
NOTE:
If you don't have any tubes that go with the Mummy case, use your imagination and get creative. See my example at the bottom of the tutorial.
Ok we are ready to start.
REMEMBER TO SAVE OFTEN
Step 1:
Open all your tubes in psp. Minimize for now.
Open a new Image 500 x 500 pixels and flood fill with white.
Copy my Mummy Case and paste as a new layer. I resized mine by 80%.
Move it to one side of your canvas.
Duplicate and Mirror.
Duplicate again and position it in the center of the other two cases.
Hide your background layer and merge all visible. Rename Blur.
Unhide your background layer.
Working on your blur layer go to Adjust - Blur - Gaussian Blur - 20
Move it to the right slightly. Duplicate and go to Image - Mirror.
Right click on the duplicate layer in the layer palette and choose Merge Down.
Activate your blur layer.
Go to Effects - Toadies - Plain Mosaic Blur with the following settings.
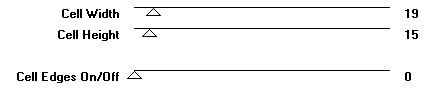
Select your Magic Wand with the following settings.
Click on one of the black lines.
Add a new layer, name it Gold Lines.
Zoom in and fill with a gold gradient.
Click on the blur layer to activate it and press Delete on your keyboard.
Deselect.
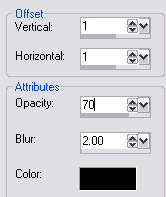
Activate the Gold Lines layer and add the following Drop Shadow.
In the layer palette right click on the Gold Lines layer and choose Merge Down.
Go to Layers - Load/Save Mask - Load Mask from Disk and apply the Monti Mosaic Edge Mask making sure Source Luminence and Invert Mask Data are checked.
Unhide the white background layer.
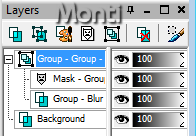
Right click on your group layer in the layer palette and choose Merge Group.
Step 3:
Click on the top layer to activate it.
Copy and paste the Mummy Case as a new layer on your canvas. Resize by 80%.
Duplicate and Mirror.
Apply the following Drop Shadow to each of the Mummy Cases
Vertical: 0
Horizontal: 5
Opacity: 40
Blur: 5
Colour: Black
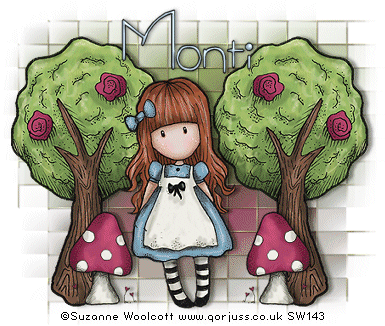
Open the tube you want to use and copy and paste as a new layer, resize if necessary.
Make sure this layer is at the top. Rename Tube.
Duplicate and mirror.
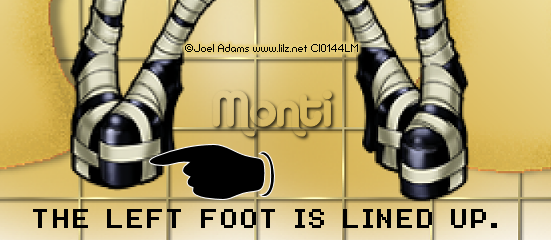
Zoom in amd line the feet up so at least one of the feet is level with the one from the other layer.
See screen shot below
Apply the following Drop Shadow to each of the Tube layers
Vertical: 0
Horizontal: 5
Opacity: 60
Blur: 5
Colour: Black
Step 4:
Set your foreground to a dark colour from your tube and your background to a light colour from your tube. Change your background to Foreground/Background gradient.
Select your text tool and a font of your choice. Use the following settings
NOTE: If you choose a different font and the text overlaps adjust your Kerning.
Type out your saying.
I used "If you catch me" on one side and "You can unwrap me" on the other.
Use your nodes to stretch and pull into position. Go to Object - Align Vertical Center in canvas.
Convert to raster layer and apply the following Inner Bevel.
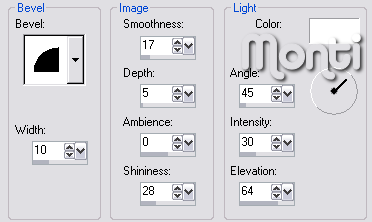
Apply the following Drop Shadow.
Vertical: 2
Horizontal: 3
Opacity: 50
Blur: 3
Colour: Black
Add your name using the same colours but change the font and size to suit you. Make sure you change the font back to Horizontal and the Kerning back to 0.
Apply the same Inner Bevel and Drop Shadow we used on the other text.
I also added a very slight Gradient Glow but this is optional.
Hide your white background layer and crop to size.
Resize as neccessary making sure all layers is checked.
Add the artists copyright and your watermark.
Unhide all your layers.
Step 5:
Hide your duplicate tube layer and go to Edit - Copy Merged.
Open Animation Shop and paste as a new animation in animation shop.
Back in PSP hide the tube layer and unhide the duplicate tube layer.
Copy merged and paste after current frame in animation shop.
Edit - Select all and set the Frame Properties to 50.
Save as a gif.
No comments:
Post a Comment