


This tutorial was written by Monti on May 2nd 2011. It's concept is copyrighted to Monti. Any creation you make from my ideas are yours. You may print out this tutorial for your own personal use, but please do not copy it in any way to put online, pass out or rewrite without my permission or worse yet attempt to claim as your own.
This was written for psp 9 but will work in other versions.
For this tutorial you will need
Paint Shop Pro
Font of your Choice
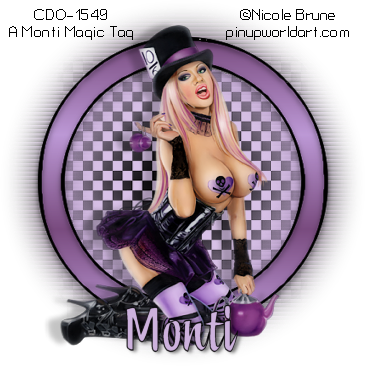
I used 1 MrKleen DNA.
Tube of your Choice
I am using the art of Dirk Richter.
You can purchase a license to use his work from CDO.
Plugins and Filters
Lokas 3D Shadow - available *HERE*
Eye Candy 5 - Impact - Glass
Mask
Becky's Mask 42 - Download *HERE* and place in your Masks folder.
Ok we are ready to start.
REMEMBER TO SAVE OFTEN
Step 1:
Open a new 500 x 500 transparent image in PSP.
Add a new raster layer and flood fill with Black.
Apply Becky's mask 042 with the following settings:
Source Luminence - Fit to Canvas - Hide All Mask - All Checked
Layers - Merge Group.
Step 2:
Set your Foreground to a light colour from your tube and your Background to a darker shade of the same colour.
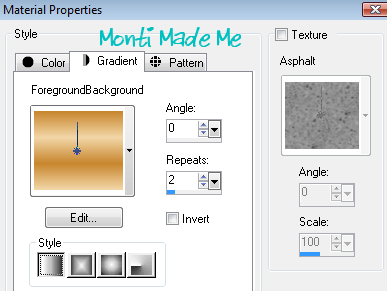
Change your Foreground to Gradient with the following settings and null your background.
Activate your Presets shapes with the following settings.
Circle - Create as Vector - Line Width: 25
Draw out a circle on your canvas.
Once happy with the size go to Objects - Align - Center in Canvas and then convert to Raster layer.
Go to Selections - Select All - Float - Selections - Modify - Expand: 2.
Add a new raster layer and flood fill with black.
Go to Selections - Modify - Contract by 4 and press delete on your keyboard.
Deselect.
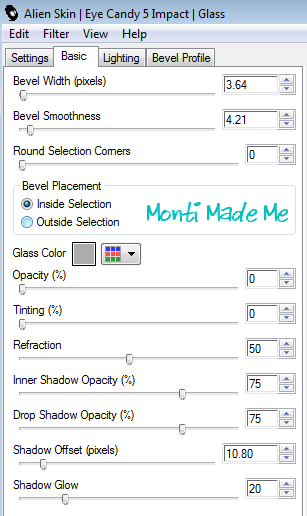
I added Eye Candy 5 Impact - Glass to my black circle layer with the following settings.
NOTE: If you don't have this you can add an Inner Bevel or leave plain and just add a blurry Drop Shadow.
Eye Candy 5 Impact - Glass - under settings click on Clear then under Basic use the other settings shown below:
Step 3:
Click on your coloured circle layer to activate it and with your Magic Wand click in the centre of the circle.
Go to Selections - Modify - Expand by 5
Add a new raster layer and move it to the bottom of the layer palette.
Fill the selection with the light colour from your tube and then deselect.
Lower the opacity of this fill layer to 68%.
In the layer palette hide all layers apart from the black and gradient circle layers.
Go to Edit - copy Merged - Edit - Paste as a new Layer.
Move to the bottom of layer palette and go to Adjust - Blur - Gaussian Blur: 20
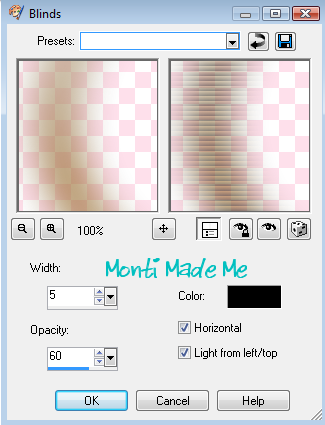
Then go to Effects - Texture Effects - Blinds with following settings:
Step 4:
In the layer palette activate your top layer and copy and paste your tube as a new layer.
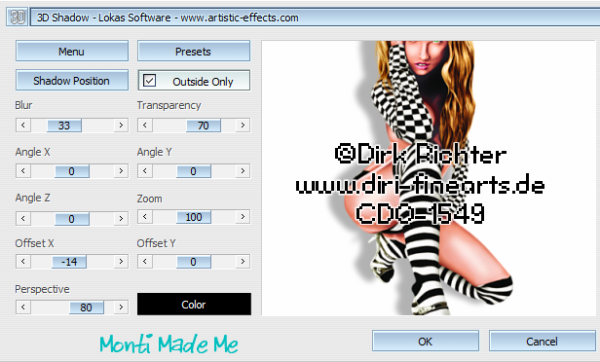
Add a drop shadow - I used Lokas 3D Shadow with the following settings
If you want to resize your tag do so now.
Add the artists copyright and your license number if needed.
Set your Foreground to Black and your Background to a colour from tube and add your name using a font of your choice.
Add the following drop shadow to your name
Vertical: 0
Horizontal: 3
Opacity: 55
Blur: 5
Colour: Black
Save your finished tag.
No comments:
Post a Comment