


This tutorial was written by Monti on December 1st 2005 and reworked on 11th October 2014. It's concept is copyrighted to Monti. Any creation you make from my ideas are yours. You may print out this tutorial for your own personal use,
but please do not copy it in any way to put online, pass out or rewrite without my permission or worse yet attempt to claim as your own.
This was written for psp 9 but will work in other versions.
For this tutorial you will need:
Paint Shop Pro
Neology Checkered Tiling
Available at http://grafnet.com.pl/Filters/Neology
Font of your choice
I used Daybreaker
Tube of your choice
I am using the wonderful art of Jose Cano used with a license which you can get from http://www.canotubes.com
Ok we are ready to start.
REMEMBER TO SAVE OFTEN
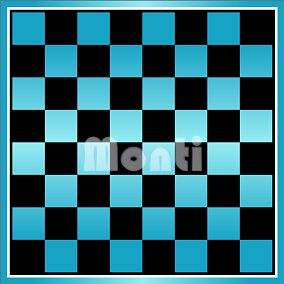
Step 1:
Open a new image 400 x 400 transparent image.
Flood fill with white and go to effects Neology Checkered Tiling.
Use the following settings.
Cell Amount = 8
Alpha toggle = 255
and press ok.
If there are any part squares (there shouldn't be), use your crop tool to crop them off.
Depending on what tube you are using you can now choose to colour either the black or the white squares.
Decide which ones you want to colour and use your magic wand to select them all.
When they are all selected set your Foreground to a darker colour from your tube and your Background to a light matching colour from your tube.
On your Foreground colour, click on it and select Gradient - Foreground Background, set to Linear - Angle: 0 - Repeats: 1
Flood fill the selected areas.
Deselect.

Step 2:
Go to Image - Add Border with the following settings
Black 4
White 4
Black 10
Select the outside black border with your magic wand and fill with your gradient but change the angle to 90.
Minimize this image for now as you will need it again later.
Step 3:
Open a new image 300 x 300
Flood fill with your gradient but put the angle back to 0
Image add border
White 2
Black 10
White 3
Copy and paste this as a new layer on the original checkered image.

Step 4:
Still on the layer you just added, go to Selections - Select All - Selections - Float - Selections - Modify - Contract: 15 Copy and Paste a close up of your tube as a new layer, go to Selections - Invert and while on your tube layer press delete on the keyboard.
Change the blend mode of the close up layer to luminance legacy.
Step 5:
Copy and paste your tube as a new layer and resize if necessary.
Erase any area going past the centre square border. See my tag for an example.
Add a drop shadow of your choice. The one I used was
Vertical: 5
Horizontal: 5
Opacity: 80
Blur: 19
Colour: Black
Add the artists copyright.
Step 6:
Add a new layer and add your name using your favourite font. Size will depend on the font used.
Set the background to your gradient and the foreground to the darker colour from it.
Convert to raster layer and Select All - Float.
While selected add a new raster layer and move below the name layer.
Go to Selections - Modify - Expand by 2 and fill with black.
On the black name layer add the same drop shadow we used on the tube but change the blur to 7.
Layers merge all visible and resize if desired.
Save your tag.

No comments:
Post a Comment