


This tutorial was written by Monti on October 20th 2006 and reworked on 11th October 2014. It's concept is copyrighted to Monti. Any creation you make from my ideas are yours. You may print out this tutorial for your own personal use, but please do not copy it in any way to put online, pass out or rewrite without my permission or worse yet attempt to claim as your own.
This was written for PSP 9 but will work in other versions.
For this tutorial you will need:
Paint Shop Pro
Mura Meisters Cloud
Available at the link below
Script Font of your Choice
I used Miss Lankfort which is a pay font so I cannot supply it.
A Tube of your choice
The image used in this tutorial is ©Keith Garvey.
If you wish to use his work please visit
www.garv-girlspsptubes.pinnaclecart.com to purchase a license.
My Supplies
This contains the frames, nameplate and bow. You can download the zip file
All supplies were made by me, please do not share or use in another tutorial without my permission.
Ok we are ready to start.
REMEMBER TO SAVE OFTEN
Step 1:
Open your tube and press shift D to make a copy. Close the original.
Unzip my supplies and open the Nameplate tube, Chain frame, Stand frame and the bow in psp and minimize.
Open a new image 700 x 700 and flood fill with white. We can resize this later.
Copy and paste the Chain Frame tube as a new layer. Rename this layer Chain Frame.
Copy and paste your tube as a new layer and position it inside your chain frame. (Minimize the original tube as we will need it later). Rename this layer tube.
Resize if needed. I left mine a bit bigger than the frame to make it look like she was chained to the top
Add the following Drop Shadow
Vertical: 2
Horizontal: 5
Opacity: 50
Blur: 5
Colour: Black
If you want it to appear like some of her is behind the frame as in my tag please do the step below. If not you can skip this part.
Click on the Chain Frame layer to activate it and go to Selections - Select all - Selections - Float - Defloat.
Activate your tube layer and zoom in to the areas you wish to erase.
Select your eraser tool with the following settings.
Erase the parts of your tube that you want to be behind the frame.
Don't worry about going over the selections as you will be unable to erase any part of the tube that is not in the selected areas. Deselect.
Copy and paste your Stand Frame tube as a new layer and move it down to just above your white background layer. Rename Stand Frame.
Use your mover tool to move it down and into position so it looks like the Chain Frame is hanging from the stand.
Copy and paste your Nameplate tube as a new layer and position it towards the bottom of the stand making sure the lowest point DOES NOT come lower than the actual stand. Use my tag as an example.
Rename Name Plate and move to the top of the layer palette.
Step 2:
Set your Foreground to a light colour from your tube and your Background to a darker colour from your tube.
Add a new raster layer name it Background and move this below the Stand frame layer.
Use your selection tool with the following settings to select the area between the Stand Frame and going all the way down to the Nameplate.
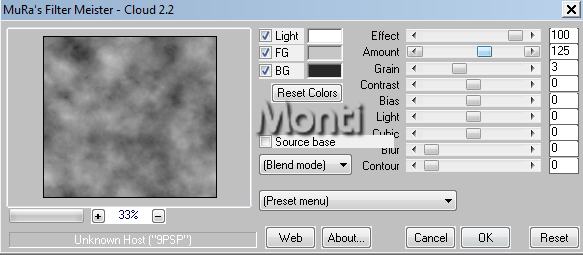
Go to Effects, Mura Meisters Clouds with the following settings.
DO NOT DESELECT.
Go to Image - Resize and resize all layers by 80% bicubic selected.
Copy and paste a close up of your tube as a new layer. Go to Selections - Invert and while on your close up layer press delete on the keyboard.
Deselect and change the blend mode to Soft Light.
Activate my bow tube - recolour if needed and then Click on the top (Tube) layer to activate it and copy and paste the Bow as a new layer and position it at the top of the Stand Frame between the 2 hanging chains. Rename bow.
Step 3:
We are now going to add Drop Shadows.
On your Bow layer add the following drop shadow
Vertical: 2
Horizontal: 4
Opacity: 44
Blur: 5
Colou: Black
Activate the Chain Frame layer and repeat the above Drop Shadow.
Activate the Nameplate layer and repeat the above Drop Shadow.
Activate the Stand Frame layer and add the following Drop Shadow
Vertical: 0
Horizontal: 4
Opacity: 44
Blur: 5
Colour: Black
Hide the white background layer and crop Merged Opaque. Go to Layers - Merge all Visible and resize if you want to, making sure ALL layers is checked.
Add the artists copyright and your watermark.
Set your Foreground to a dark colour from your tube and your background to a lighter colour.
Select a script font of your choice, making sure vector is selected and type in your name.
Use your nodes to move into position on the name plate and convert to raster layer. Add the following Drop Shadow
Vertical: 1
Horizontal: 2
Opacity: 63
Blur: 2
Colour : Black
Save your tag

No comments:
Post a Comment