
This tutorial was written by Monti on December 21st 2008 and reworked on 19th October 2014. It's concept is copyrighted to Monti. Any creation you make from my ideas are yours. You may print out this tutorial for your own personal use, but please do not copy it in any way to put online, pass out or rewrite without my permission or worse yet attempt to claim as your own.
This was written for psp 9 but will work in other versions.
For this tutorial you will need
Paint Shop Pro
My Just Gorjuss Scrap Kit
Download HERE.
Font Of Your Choice
I used Croobie.
Mask Of Your Choice
I used WSL_Mask26 by Chelle. Thanks Chelle.
Please visit Wee Scots Lass and her masks are listed on the right hand side.
Her masks are great so you might want to get them all while you're there.
5 Tubes of your Choice
I am using the cute art of Alicia Mujica.
You can purchase her tubes from her store HERE.
Eye Candy 3.1 Optional
I used this to give the text a glass effect.
Ok we are ready to start.
REMEMBER TO SAVE OFTEN
Step 1:
Open a new image 600 x 600 pixels.
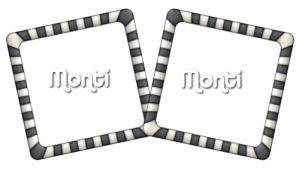
Open my Monti-JustGorjuss-SquareFrame.png frame and go to Edit - Copy - Edit - Paste as a new layer onto the canvas.
Go to Image - Resize 60% - Smart Size - All layers unchecked.
Go to Image - Rotate - Free Rotate - Left: 12 - Rotate Single Layer Around Canvas Center.
Rename Left Frame.
Go to Layers - Duplicate - Image Mirror.
Rename the duplicate Right Frame.
Use your mover tool to line them up so they overlap slightly as shown below.
In the layer palette right click on the Left Frame layer and choose Duplicate.
Go to Image Flip and then rename Bottom Left.
Do the same for Right Frame layer and then rename Bottom Right.
Move the duplicate layers below the original layers in the layer palette and move into position as shown below.

Your layer palette should now look like this.

Activate each frame in turn and on each one go to Adjust Sharpen.
Step 2:
Open a paper of choice. I used Monti-JustGorjuss-Paper1.jpg
I colourized it to match my tube.
Once you are happy with the colour of your paper activate your original canves with the frames on.
Click on the Bottom Left Frame to Activate it.
Select your Magic Wand with Tolerance and Feather set to Nil.
Click inside the frame and go to Selections - Modify - Expand by 5
Set your Foreground to pattern and find the paper you just colourized with the following settings.
Angle = 0 Scale = 80
Add a new Raster layer and fill the selection with the paper.
DO NOT deselect.
Copy and paste one of the tubes as a new layer.
Resize if needed making sure all layers is UNchecked.
Move it into position so the part of the tube you want showing is inside the selections.
Once happy with the positioning go to Selections - Invert and press delete on your keyboard.
Deselect by going to Selections - Select None.
Add a small drop shadow to the tube. I used
Vertical: 0
Horizontal: 0
Opacity: 60
Blur: 10
Colour: Black
Move these layers underneath the frame layer.
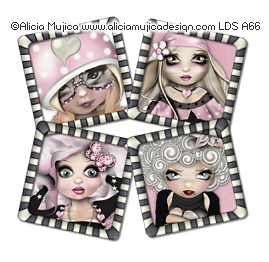
Repeat these steps for the other 3 frames, making sure the fill and tube layers are underneath each frame layer.
Your image should now look like this
Activate your Right Frame and add the following Drop Shadow
Vertical: 3
Horizontal: 3
Opacity: 50
Blur: 3
Colour: Black
Repeat for the other frames.
Step 3:
Go to Image - Resize with the following settings:
80% Bicubic Selected - ALL layers Checked.
Then go to Image - Canvas Size - 500 x 500 pixels - Center Placement.
Merge All Visible. Rename Frames.
Add a new raster layer and go to layers - arrange send to bottom and fill with a colour from your tubes. I used #A7A8B8
Apply a mask of your choice. I used WSL_Mask26 with the following options checked
Source Luminence - Fit to Canvas - Hide All Mask - Click Apply.
Activate your Merged frame layer and go to Edit - Copy - Edit - Paste as a New Layer.
Move it beneath your original frame layer and go to Adjust - Blur - Gaussian Blur - 17.
Colourize to match your mask layer.
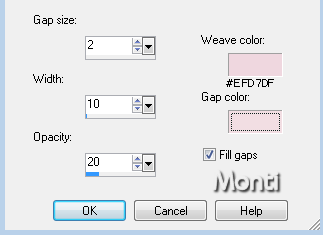
While still on the blur layer go to Effects - Texture Effects - Weave with the following settings.
For the weave and gap colour I used a colour from my frame background #E8CCD4.
Step 4:
Open the a Monti-JustGorjuss-DoubleBow from the kit, choose one that matches your tubes. Use your lasoo tool to select the coloured part of the bow.
Colourise to match your tube.
Deselect.
Copy and paste as a new layer onto the canvas.
Go to Image - Resize - 30% Smart Size - ALL layers UNchecked.
Position it in the middle of the frames.
Go to Adjust - Sharpen and add the following Drop Shadow
Vertical: 3
Horizontal: 3
Opacity: 50
Blur: 3
Colour: Black
Open a butterfly from the kit.
Copy and paste as a new layer. Resize with the same settings we used above and add the same drop shadow.
Move into position at the top left of the frames.
Go to image - canvas size - resize to 600 x 600 pixels.
Copy and paste your main tube as a new layer and resize it to fit. I resized mine by 50%.
Move into position and add the following Drop Shadow
Vertical: 0
Horizontal: 5
Opacity: 50
Blur: 5
Colour: Black
Step 5:
Open the Monti-JustGorjuss-Paper8.jpg from the kit.
Activate the Magic Wand still on Tolerance: 10 - Feather: 0 click on one of the cream stripes.
Go to Selections - Modify - Select Colour Range with the following settings.
Tolerance: 90 - Softness: 10 - Reference colour: #E0DBC5 - Add Colour Range checked and press ok.
While still selected go to Adjust - Brightness and Contrast with the following settings
Brightness: 30 - Contrast: -8
Deselect and minimize.
My tag was way too big for my liking - I prefer smaller tags - so I resized mine by 70% - Weighted Average - ALL layers: Checked.
Activate your Text Tool with a font of your choice - I used Croobie with the following settings:
Size: 30 - Foreground: Black - Background: Monti-JustGorjuss-Paper8.jpg - Angle: 0 - Scale: 50
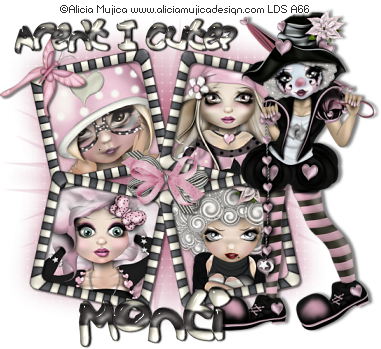
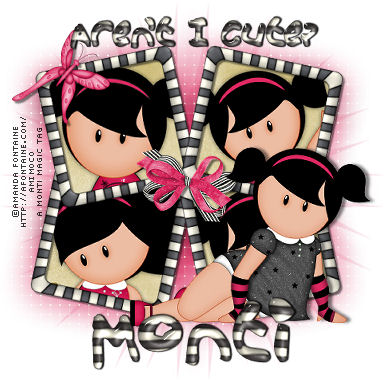
Type out the words "Aren't I Cute?"
Position at the top of the frames and go to Objects - Align - Horizontal In Canvas.
Convert to Raster layer and add the following Inner Bevel.

Then go to Effects - Plugins - Eye Candy 3.1 - Glass with the following settings:
Bevel Width: 10 - Bevel Shape: Mesa - Flaw Spacing: 20 - Flaw Thickness: 10 - Opacity: 50 - Refraction: 2 - Colour: White - Highlight Brighness: 100 - Highlight Sharpness: 100 - Lighting Direction: 127 - Lighting Inclination: 39
Click on the tick.
Add the following Drop Shadow
Vertical: 0
Horizontal: 2
Opacity: 100
Blur: 2
Colour: Black
Change the font size to 72, leave all other settings the same and type your name.
Go to Objects - Align - Horizontal in Canvas.
Convert to Raster layer and add the same Inner Bevel and Eye Candy Glass that we used on the other text.
Add the same Drop Shadow used above.
Add a new layer and add the artists copyright and your watermark.
Activate the Crop Tool.
Select Merged Opaque option and crop.
Save your finished tag.

No comments:
Post a Comment