

This tutorial was written by Monti on September 13th 2008. It's concept is copyrighted to me. Any creation you make from my ideas are yours. You may print out this tutorial for your own personal use, but please do not copy it in any way to put online, pass out or rewrite without my permission or worse yet attempt to claim as your own.
This was written for psp 9 but will work in other versions.
For this tutorial you will need
Paint Shop Pro
My Spooky Friends Scrap Kit
This is available to purchase from Taggers Delight.
A Font of your Choice
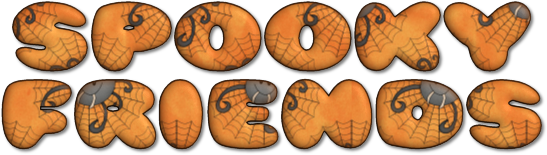
I used Pleasantly Plump.
2 Masks of Choice
I used the following Masks.
Becky's Mask 022 - Thank you Becky.
Download *Here*.
Place in your PSP Masks Folder.
WSL_Mask55 - Thank you Chelle.
Download *Here*.
Masks are listed on the right. She has some great masks so you might want ot download them all. Unzip and place in your PSP Masks Folder.
Ok we are ready to start.
REMEMBER TO SAVE OFTEN
Step 1:
Open a new transparent image 500 x 500 pixels.
Add a new Raster layer and go to Edit - Select All.
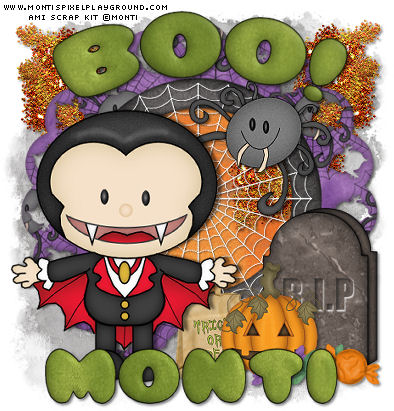
Copy one of my papers - I used Monti-SpookyFriends-Paper-Swirls-Black.jpg - and go to Edit - Paste Into Selection.
Deselect.
Apply a mask of your choice - I used Becky Mask 22.
In the layer palette right click on the Mask layer and Merge Group.
Copy and paste another paper of choice - I used Monti-SpookyFriends-Paper-Plain-Orange.jpg - as a new layer.
Add a round mask of your choice - I used WSL_Mask55.
In the layer palette right click on the Mask layer and Merge Group.
Go to Layers - Merge Group.
Resize by 80% - Bicubic selected - ALL layers UNChecked.
Step 2:
Copy and paste one of my frames as a new layer and resize by 80% - Bicubic selected - All layers UNChecked.
Add the following Drop Shadow
Vertical: 2
Horizontal: 2
Opacity: 50
Blur: 4
Colour: Black
Copy and paste one of my Spider Webs as a new layer - I used Monti-SpookyFriends-SpiderWeb-WhiteThin.png.
Resize by 60% - Smart Size selected - All layers UNchecked.
Go to Adjust - Sharpen.
Add the following Drop Shadow
Vertical: 1
Horizontal: 1
Opacity: 50
Blur: 2
Colour: Black
Copy and paste Monti-SpookyFriends-Spider.png as a new layer.
Resize by 40% - Smart Size selected - All layers Unchecked.
Go to Adjust - Sharpen.
Move to the top right of the web and add the following Drop Shadow.
Vertical: 2
Horizontal: 2
Opacity: 50
Blur: 4
Colour: Black
Copy and paste one of my Boo! word arts as a new layer and move to the top center.
Add the same Drop Shadow.
Copy and paste one of my Spooky Friends Creatures as a new layer and position.
Add the following Drop Shadow
Vertical: 0
Horizontal: 5
Opacity: 50
Blur: 5
Colour: Black
Add one of my Trick or Treat bags and resize to between 25% and 30% - Smart Size selected - All layers UNchecked.
Go to Adjust - Sharpen.
Add the following Drop Shadow
Vertical: 2
Horizontal: 2
Opacity: 50
Blur: 4
Colour: Black
Move the bag layer beneath your creature layer.
Add any other elements you want resizing each one and adding the same drop shadow we used on the trick or treat bag.
Copy one of my Glitters and paste as a new layer - Resize 50% - Bicubic Selected - All layers UNchecked annd move to the top side of the canvas and move it down so it is just above your mask layers in the Layer palette.
Duplicate and then Mirror.
Add a Drop Shadow to each Glitter layer.
Step 3:
Select your text tool and set your Foreground to Black and your Background to a paper of choice from my kit.
Set the Font to Pleasantly Plump.
Add your name and click Apply.
Convert to Raster layer and add the following Inner Bevel.

Crop to size using Merged Opaque.
Unhide it again and ressize your tag if needed. I resized mine by 85% - Bicubic Selected - ALL layers Checked.
Add the credits as a new layer.
PLEASE NOTE: Credits for this kit without an artists work are
Scrap Kit ©Monti www.montispixelplayground.com
Save your tag.
No comments:
Post a Comment