

This tutorial was written by Monti on June 27th 2008 and reworked on 19th October 2014. It's concept is copyrighted to Monti. Any creation you make from my ideas are yours. You may print out this tutorial for your own personal use, but please do not copy it in any way to put online, pass out or rewrite without my permission or worse yet attempt to claim as your own.
This was written for psp 9 but will work in other versions.
For this tutorial you will need
Paint Shop Pro
My Symbol
Download *Here*. Open in PSP
Eye Candy 4000 - Optional
A Font of your Choice
I used Zipty Do which is a pay font so I can unable to supply it.
2 Tubes of your Choice
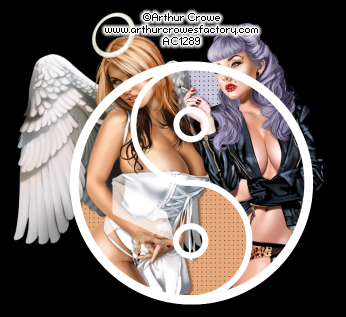
I am using the wonderful art of Arthur Crowe used with a license from Arthur Crowe's Factory.
Please only use an artist you have permission for.
Ok we are ready to start.
REMEMBER TO SAVE OFTEN
Step 1:
Open a new transparent image 700 x 700 and flood fill with black so we can see what we are working on - don't worry we will change this later and resize.
Copy and paste my Symbol as a new layer - rename Symbol.
Select your Magic Wand with the following settings:
Click inside the left main shape and go to Selections - Modify - Expand by 8.
See Screen Shot below.

Add a new Raster layer and move it beneath the Symbol layer.
Fill the selection with a light colour from the 'saint' tube.
Go to Effects - Texture Effects - Weave with the following settings and use a dark colour from your tube for the weave and gap colour.
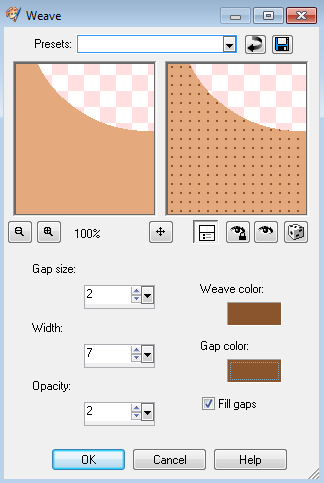
DO NOT Deselect.
Copy and paste your 'saint' tube as a new layer and move this to the top in the layer palette.
Resize as needed - I resized mine by 80% - Bicubic - All layers UNchecked.
Position it where you want it.
Go to Selections - Invert and select your Eraser tool and erase any parts that you don't want to show outside of the selection - I Mirrored my tube first and then erased the bottom right of the tube but wings intact so it looks like she is leaning out.
Deselect and add a Drop Shadow to your tube.
I used:
Vertical: 1
Horizontal: 5
Opacity: 40
Blur: 5
Colour: Black
You will notice the shadow shows over our Symbol in some areas, don't worry we will hide that later.
Step 2:
In the Layer Palette activate the Symbol layer.
Click inside the Right main shape and go to Selections - Modify - Expand by 8.
Add a new Raster layer and move it beneath the Symbol layer.
Fill the selection with a light colour from the 'sinner' tube.
Go to Effects - Texture Effects - Weave with the same settings we used earlier using a dark colour from your tube for the weave and gap colour.
DO NOT Deselect.
Copy and paste your 'sinner' tube as a new layer and move this to the top in the layer palette.
Resize as needed and position where you want it.
Go to Selections - Invert and select your Eraser tool and erase any parts that you Go to Selections - Invert and select your Eraser tool and erase any parts that you don't want to show outside of the selection - I erased the bottom right of the tube and the parts that went into the left hand shape but chose to leave her arms and top of her body intact so it looks like she is leaning out.
Deselect and add a Drop Shadow to your tube.
I used:
Vertical: 1
Horizontal: 5
Opacity: 40
Blur: 5
Colour: Black
Step 3:
Duplicate the Symbol layer and move to the top in the layer palette.
You can see by the screen shot below that this now covers the tubes but hides the drop shadow areas so we are going to erase the parts we dont need.
Select your Eraser tool - Size: 20 and erase the parts of the top symbol that cover the areas of the tubes that you want showing.
Your image should now look like this

Delete the black background layer
Step 4:
Select your Text tool with a font of your choice.
Set your Foreground to a dark colour from your 'sinner' tube and the Background to a light colour and type out the word "Sinner".
Position near to the 'sinner' tube and convert to raster layer.
Go to Effects - Plugins - Eye Candy 4000 and apply the folowing Gradient Glow:
Under basic select Glow Width: 3 - Soft Corners: 25 - Overall Opacity : 100 - Draw Only Outside Selection: checked.
Under Colour - click on Fat.
Add the following Drop Shadow
Vertical: 2
Horizontal: 2
Opacity: 50
Blur: 5
Colour: Black
Change your Foreground to a dark colour from your 'saint' tube and the Background to a light colour and type out the word "Saint".
Position near to the 'saint' tube and convert to raster layer.
Apply the same Gradient Glow and Drop Shadow.
Crop to size using Merged Opaque.
If you want to resize your image do it now.
Step 5: Optional
If you have enough of the symbol layer showing this step will show you how to add your text around the symbol shape as shown in the Barabra Jensen tag at the bottom of the tut.
If you don't have enough room just add your artists copyright as you usually do.
Click on the top layer in the Layer Palette to activate it.
Select your Preset Shapes set to Ellipse - Line Style: solid - Line Width: 1 - Foreground: black - Background; Null.
Draw a circle slightly larger than your Symbol - go to Objects - Align - Center in Canvas.
DO NOT convert to raster.
Add a new raster layer and select your Text tool set to a small font of your choice.
Hover your mouse over the circle in the area where you want your text to show. When you see an A with an arc under it click on the canvas.
Type out your artist credits and any license number and tagged by info and then convert to raster layer.
When all your text is added you can delete the vector circle layer.
Step: 6
Activate the bottom symbol layer and add the following Drop Shadow
Vertical: 0
Horizontal: 0
Opacity: 50
Blur: 5
Colour: Black
Finally add your name using colours of your choice and apply the same Gradient Glow we used earlier and save your tag.
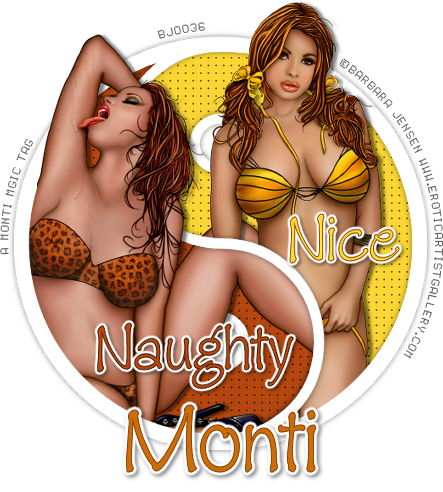
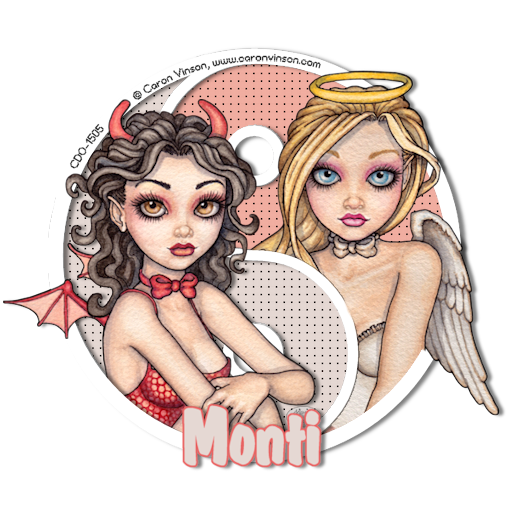
Tags Made With This Tut
No comments:
Post a Comment