

This tutorial was written by Monti on June 30th 2012. It's concept is copyrighted to Monti. Any creation you make from my ideas are yours. You may print out this tutorial for your own personal use, but please do not copy it in any way to put online, pass out or rewrite without my permission or worse yet attempt to claim as your own.
This was written for psp 9 but will work in other versions.
For this tutorial you will need
Paint Shop Pro
Tube of your Choice
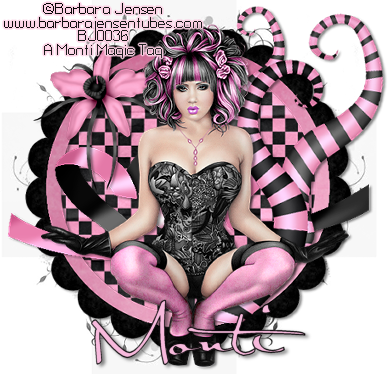
I am using the art of Barbara Jensen.
You can purchase a license to use her work from Barbara Jensen Tubes.
Scrap Kit
I am using a PTU kit called Happy Emoster which is available from Pics For Design but you could use any kit and just adapt the elements.
Fonts of your Choice
I used Satisfaction for the main text.
You will also need a small pixel font for the background text. I used Pixel Berry 08/84 Ltd.Edition.
Mask
I used Mask 25 from Moonsbeams and Spiderwebs. Place in your Masks folder.
Filters
Mura Meisters Copies
Ok we are ready to start.
REMEMBER TO SAVE OFTEN
Step 1:
In PSP open a new 600 x 600 image with a transparent background.
From the kit open ssd_paper6.jpg and ssd_paper7.jpg and and minimize them.
Activate the transparent image and select your Preset Shapes - Eclipse.
In the colour palette set your Foreground - Null and the Background - ssd_paper6.jpg at Scale: 100%.
Draw a small circle about 60 pixels in size. Go to Objects - Align - Center In Canvas and convert to Raster Layer.
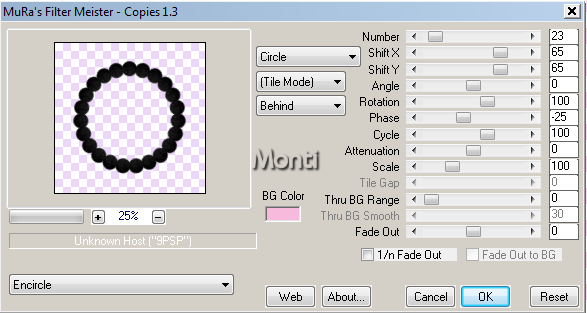
Apply Mura Meisters Copy with the following settings.
Still on your Eclipse Preset shape set your Background - Null and Foreground - ssd_paper7.jpg. Set the Line Style - Solid and Line Width - 20.
Draw out a circle in the center of the shape we just made and go to to Objects - Align - Center In Canvas and convert to Raster Layer so it looks like mine below. If you don't get the size right first time, just delete and try again.
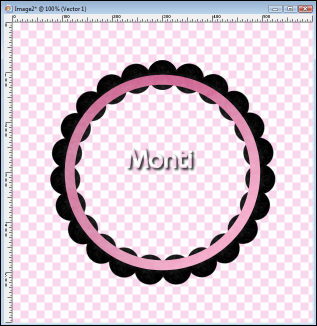
Activate your Magic Wand, Tolerance - 0, Feather - 0 and click inside the pink circle. Go to Selections - Modify - Expand - 5. Click on the black circle layer and press Delete on your keyboard.
Do NOT deselect yet.
Go to Layers - Merge Visible. Rename Frame.
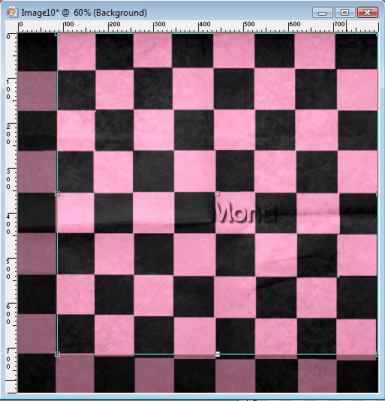
Open ssd_paper1.jpg and press Shift D to make a copy of it. Close the original.
Select your crop tool and crop 1 off row from the left and one row from the bottom as shown below.
Add a new raster layer to your frame canvas and go to Layers - Arrange - Send to Bottom.
Set your Foreground to the cropped check paper - Scale 20% and fill the bottom layer.
Go to Selections - Select - None. Rename the bottom layer - Fill.
Activate the Frame layer and add the following Drop Shadow
Vertical: 2
Horizontal: 3
Opacity: 50
Blur: 5
Colour: Black
Step 2:
From the kit open ssd_element26.png.
Copy and paste it as a new layer on your canvas and move it down slightly. Rename - Ribbon.
Add the same drop shadow we used on the frame.
Open ssd_element59.png from the kit.
Copy and paste as a new layer on the canvas.
Go to Image - Resize - 90% All Layers: Unchecked.
Go to Image - Rotate - Direction: Right - Degrees: Free - 10 - Rotate single layer around canvas center: Checked.
Position it to the right of your image - use my tag as a guide to placement.
Add the same drop shadow we used earlier.
Open ssd_element7.png from the kit.
Go to Image - Resize - 40% - Weighted Average - All Layers: Unchecked.
Poition to the top left of the frame and add the same drop shadow we used earlier.
Copy and paste your chosen tube as a new layer. Resize if necessary.
Add the same drop shadow we used earlier.
Maximize ssd_paper6.jpg. Add a new raster layer to your frame canvas and go to Layers - Arrange - Send to Bottom.
Go to Selections - Select All.
Copy ssd_paper6.jpg and paste this into selection.
Deselect.
Go to Layers - Load/Save Mask - Load Mask from Disk.
Find MB and SW Mask 25.png - set to Source Luminance - Fit to Layer - Hide All Mask and click on Load.
In the layer palette right click on the mask layer and chose Merge Group.
Step 3:
Activate your Crop tool and crop Merged Opaque.
If you want to resize your tag please do it now.
I resized mine by 85% - Bicubic selected and repeated.
Add the artists copyright and any license needed as a new layer. I also added a small Gradient Glow to mine. I have added the settings below for those interested.
I used Eye Candy 5 - Impact - Gradient Glow with the following settings:
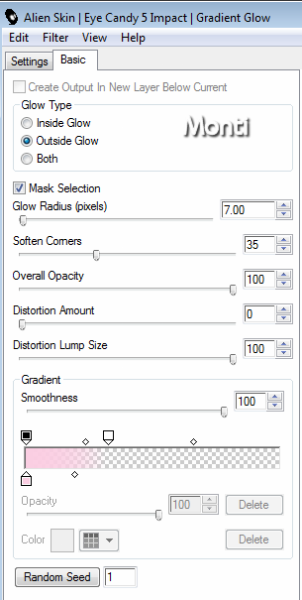
Add your name and save as a .png file.
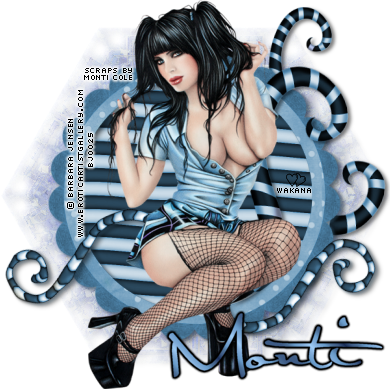
This tag was made by Wakana using parts from my FTU Just Gorjuss kit and my PTU Wizard of Oz Kit.
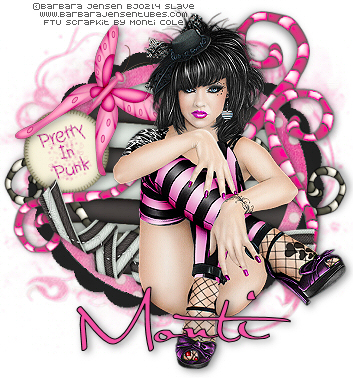
This tag was made by Slave using parts from my FTU Just Gorjuss kit and a different Moonbeams and Spiderwebs Mask.
No comments:
Post a Comment